For high-volume school and sports photography, efficiency is everything. Evoto Instant’s School Mode allows you to automate photo sorting, apply AI retouching instantly, and set up a monetization system before you even take the first shot.
Follow this step-by-step guide to master the end-to-end workflow.
Phase 1: Preparation (Web Portal)
All setup should be done on the web portal before the shoot to ensure a smooth on-site experience.
Step 1: Create Project & Import Roster
-
Create Project: Log in to the Evoto Web Portal, click Create Project, and select School Mode.
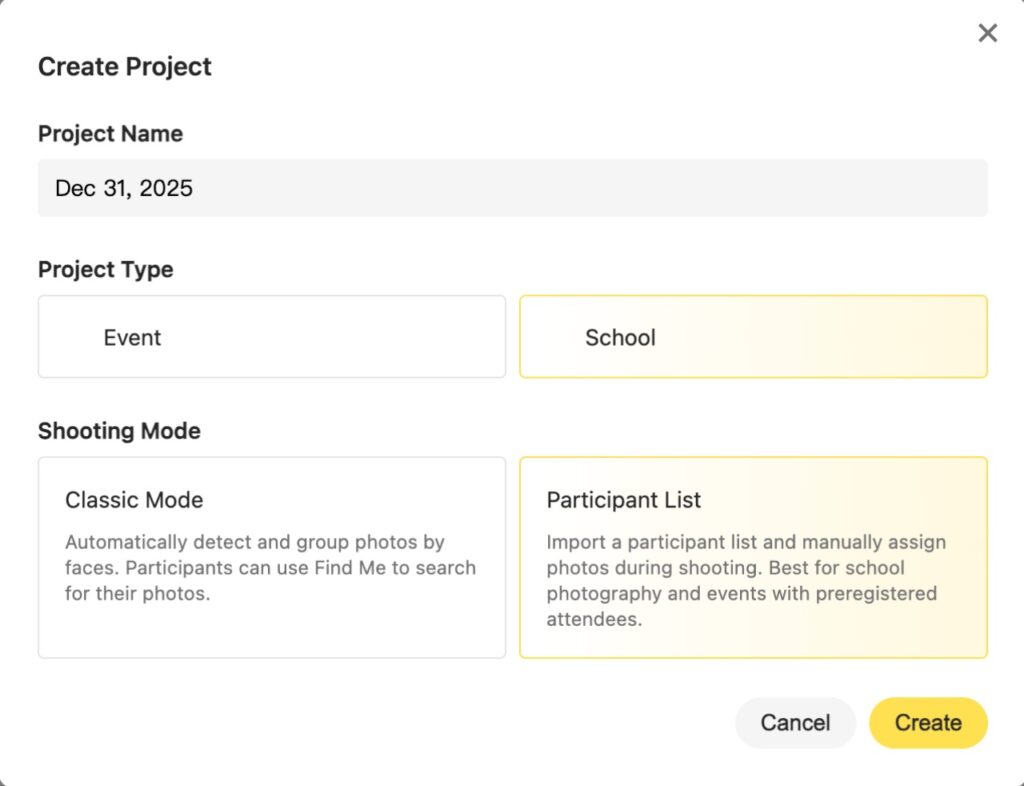
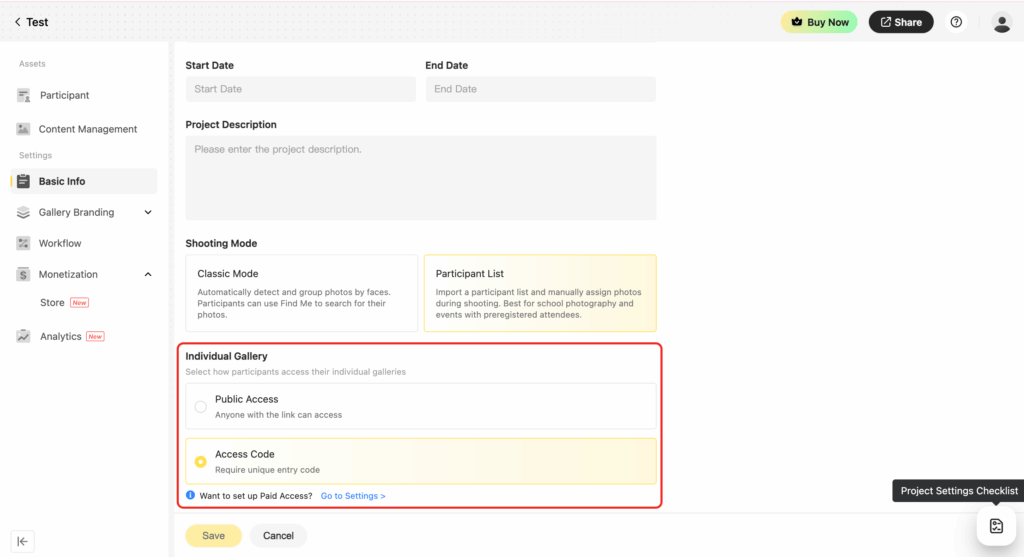
- Basic Info: Navigate to the Basic Info tab to configure gallery access settings.
-
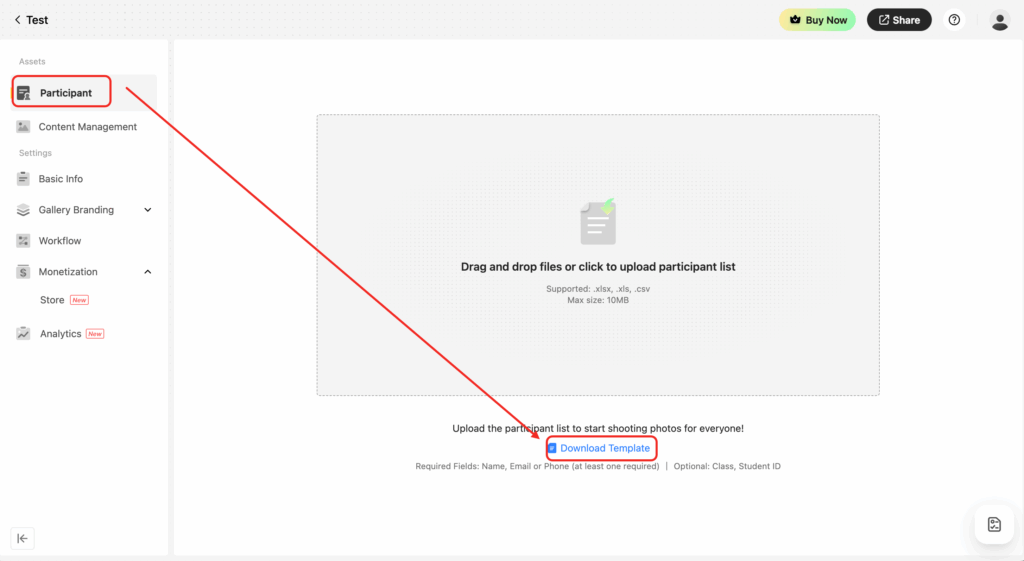
Import Data: Under the Participant tab, upload your student roster using a .csv or .xlsx file.
-
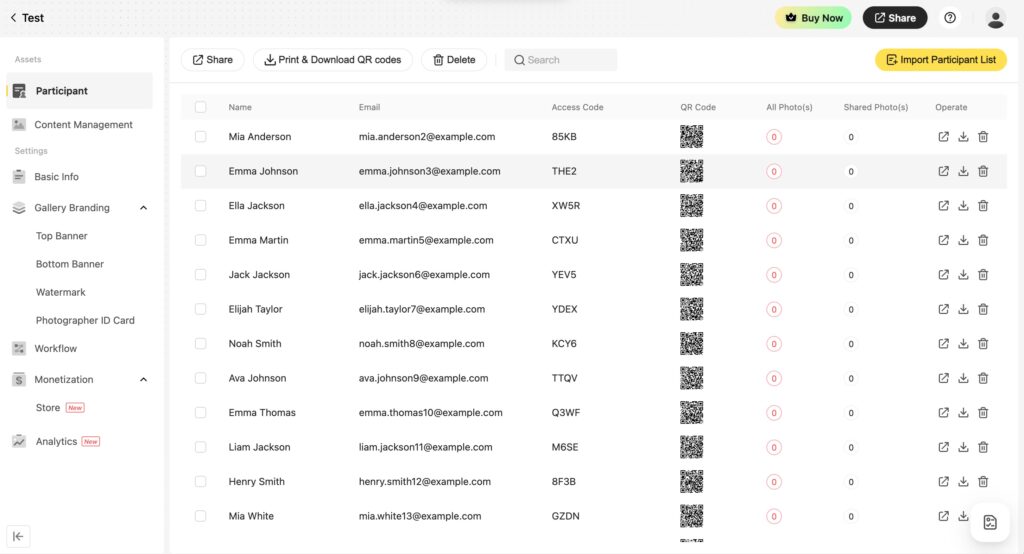
Generate QR Codes: Once uploaded, the system generates unique codes for each student. Download and print these QR cards—they are your key to automated sorting during the shoot.
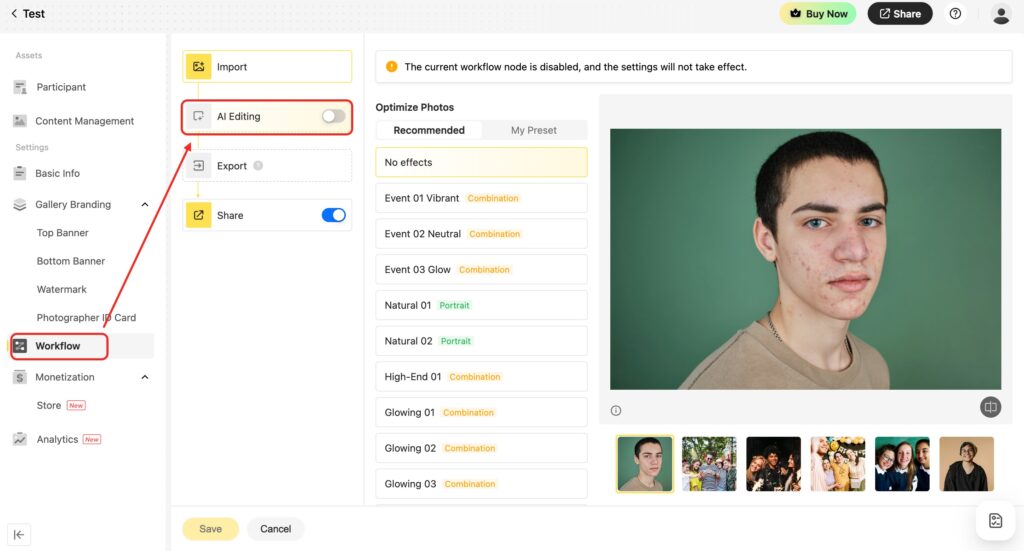
Step 2: Configure Workflow & Store
Now, define how your photos will look and how you will sell them.
-
AI Editing: Select your retouching presets now. These will automatically apply to every photo as it enters the system.
-
Gallery Branding: Upload your logo and banner to ensure the gallery matches the school’s or your studio’s brand.
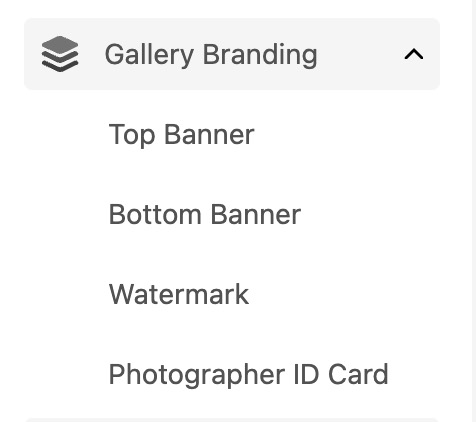
- Watermark: Upload a PNG for your brand watermark on every photo.
-
Monetization Setup:
Navigate to the Store tab to turn your gallery into a sales machine.-
Connect Stripe: Link your Stripe account to receive payouts.
-
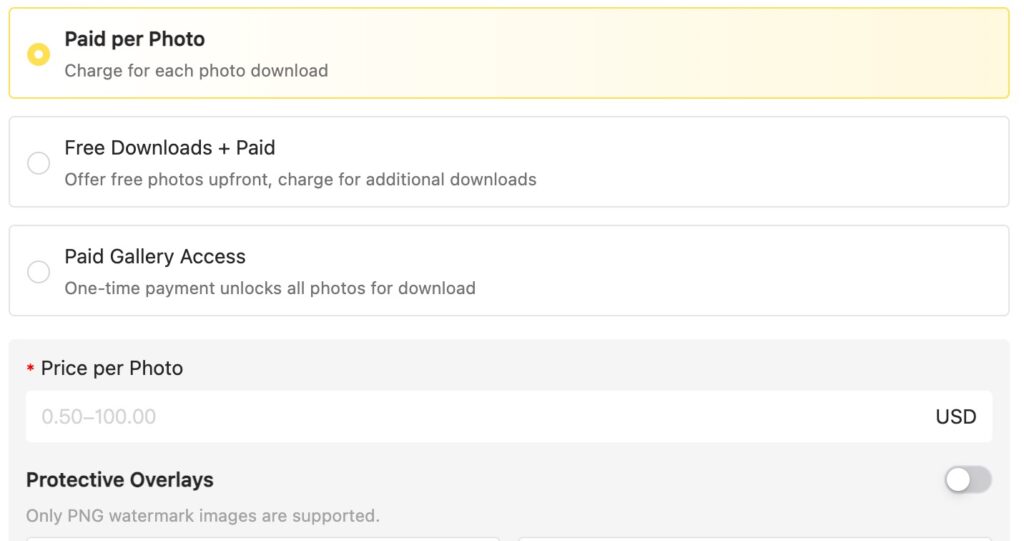
Set Pricing Model: Choose the strategy that fits your business:
-
Pay Per Photo: Set a fixed price for single downloads.
-
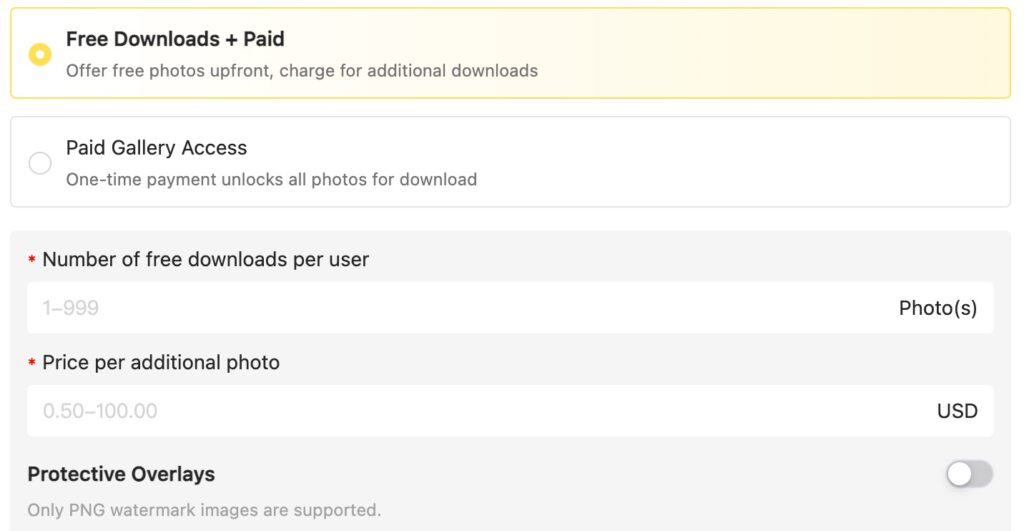
Free + Paid: Offer the first few photos for free (e.g., 1 free yearbook shot), then charge for the rest.
-
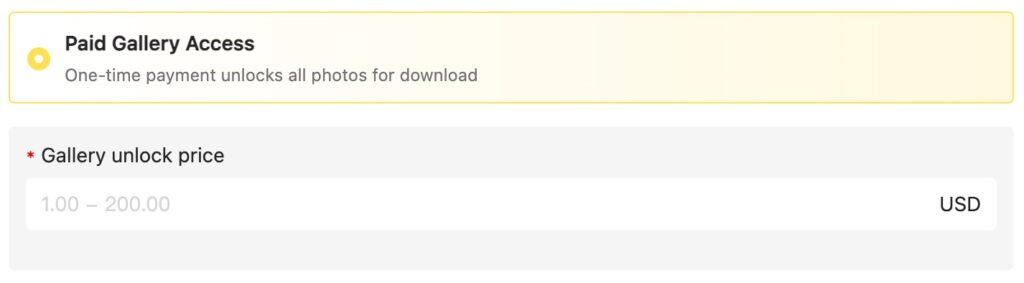
Full Gallery Access: Charge a one-time fee to unlock all photos for a student.
-
-
Protective Overlays: Enable a protective watermark to protect your images before purchase.
-
Phase 2: The Shoot (On-Site & Mobile App)
On the day of the event, your focus is purely on capturing the best shots.
Step 3: Connect & Capture (Tethered Shooting)
- AI Culling (Optional):
You can toggle AI Culling on if you want the system to automatically filter out blinking eyes or blurry shots in real-time. -
Choose the workflow that fits your style: Real-time Tethering or Standard Shooting with SD Card Import.
Option A: Tethered Shooting (Real-Time Sorting)
Best for instant feedback and immediate file backup.
-
Connect Camera:
Open the Evoto Instant App and connect your camera via USB Cable (recommended) or FTP. -
Select Sorting Mode:
-
QR Code Mode (Automated):
Simply photograph the student’s QR card first, then take their portraits. The app detects the code and automatically creates a folder, routing all subsequent photos into it until a new code is scanned.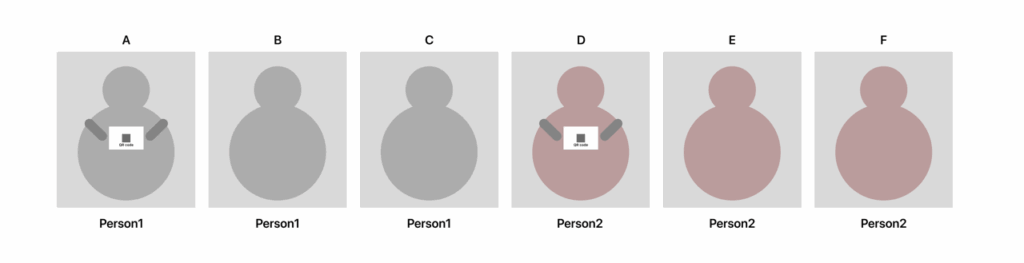
-
Manual Grouping (Click-to-Shoot):
If you don’t want to shoot with a QR code, enter Manual Mode. Tap the student’s name on the roster list, shoot, and tap “Complete & Next” to switch to the following student.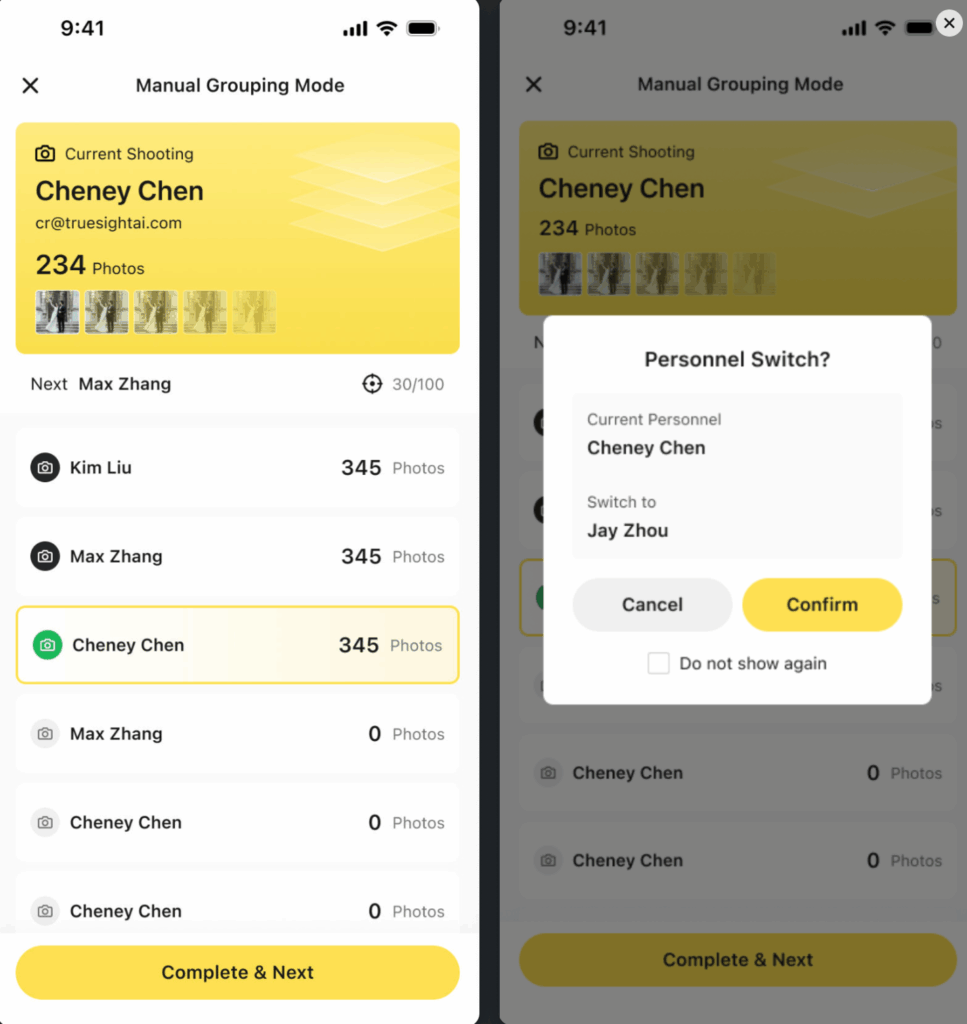
Alternatively, use your phone’s camera to scan a participant’s QR card and instantly switch to the corresponding active folder.

-
Option B: Non-Tethered Shooting (SD Card Workflow)
Best for photographers who prefer the freedom of shooting without cables.
-
The Shooting Process:
Even without the app connected, you can still automate organization. Photograph the QR card first, followed immediately by the student’s portraits. This creates the “visual separators” the AI needs to sort the images later. -
Import & Sort:
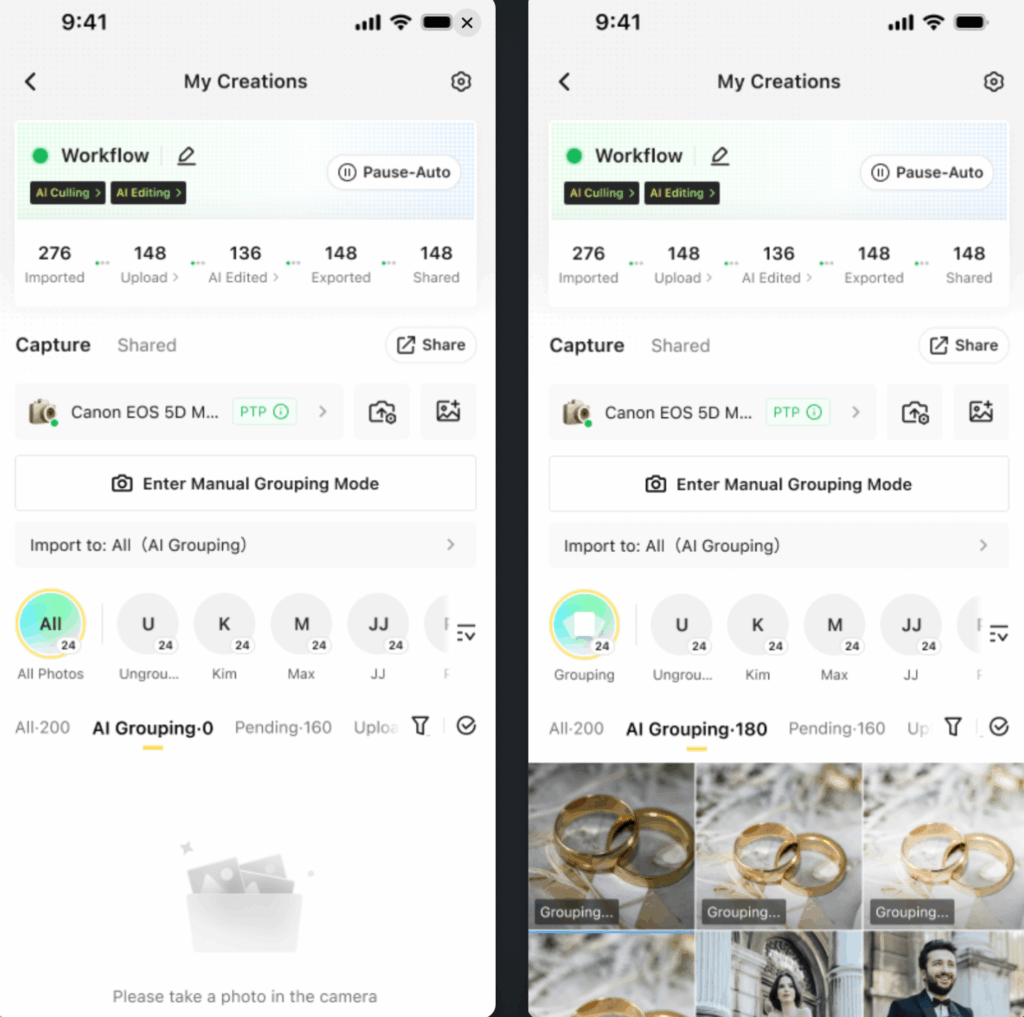
Once the shoot is finished (or during a break), import your files to Evoto Instant to trigger the auto-sorting:-
Via Mobile (On-Site): Connect an SD card reader to your phone. Import photos into the “All” tab of the project. The system will detect the QR codes sequences and automatically sort photos into the correct student folders.
-
Via Desktop (Web Portal): Upload the contents of your SD card directly to the Web Portal. After successfully upload, the system will scan, recognize the QR codes, and grouping the photos into according folder based on the roster structure.
-
-
Note: Whether you use Method A or B, Evoto’s AI Retouching can be enabled to kick in as soon as the photos enter the system, ensuring your edits are ready by the time sorting is complete.
Phase 3: Photo Delivery (Web Portal)
After the shoot, return to the Web Portal to finalize and deliver.
Step 4: Review & Batch Delivery
-
Final Check:
In Content Management tab, review the Ungrouped folder. If any QR codes were missed, select and move those photos to the correct student folders manually (both available on mobile app and web portal). -
Batch Emailing:
In Participant tab, select all participants in the list and click Share button.-
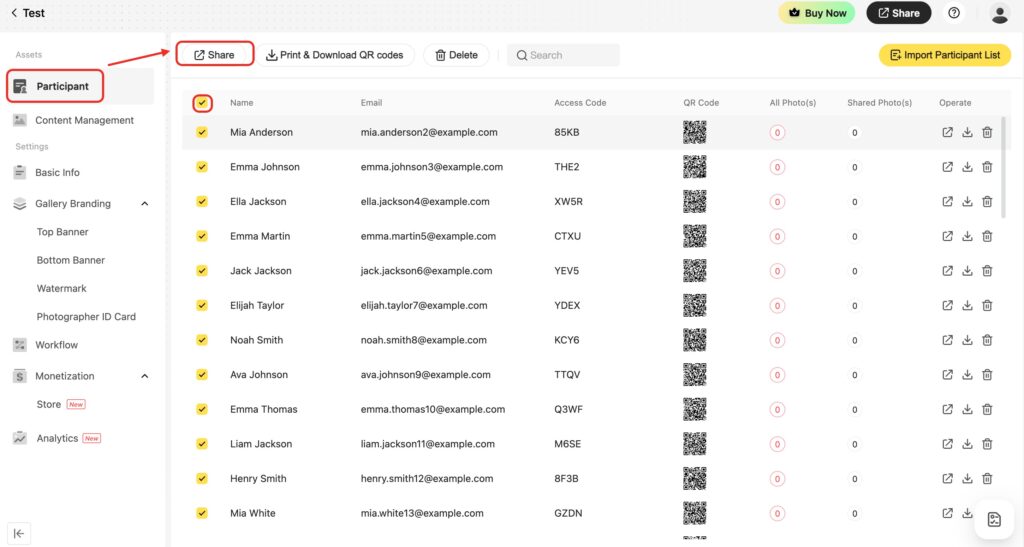 The system sends a personalized email to each parent containing their unique gallery link.
 -
Privacy: Parents must enter their specific Access Code (if enabled) to view photos.
-
Step 5: Client Purchase Experience
Once parents receive the email with unique link and access code (if enabled):
-
Preview: They view watermarked, AI-retouched previews of their child.
-
Purchase: They select photos based on the pricing model you set in Step 2.
-
Download: Upon payment, the watermark is removed, and high-resolution files are available for immediate download.