Desktop Setup & Network Connection
Before you begin, ensure your desktop is ready for a stable wireless connection.
Enable Software Permissions
Ensure Evoto has the necessary permissions on your desktop:
- When you first open Evoto and enter a project, a prompt will appear: “Evoto would like to access the camera.” Please tap “Allow” to grant these permissions.
- If you accidentally tapped “Don’t Allow,” you can go to your computer’s Settings → Evoto → Camera and enable access manually.
- Navigate to Settings → Privacy & Security → Files and Folders → Removable Volumes and enable access for Evoto.
Wi-Fi Connection
Ensure your desktop is connected to the same stable Wi-Fi network that your Sony camera will use for tethering. A strong, dedicated Wi-Fi network is recommended for optimal performance.
Memory Card Note
A memory card must be inserted in the camera for wireless tethering to function properly, as cameras often require it for buffer and communication.
Sony Camera Settings & Pairing
Adjust these settings on your Sony camera and perform the initial pairing process for wireless tethered shooting with your desktop.
Power Saving Mode
To avoid disconnection during inactivity, it is crucial to adjust your camera’s power settings.
- Power Save Start Time: Set to Off.
- Auto Power OFF Temp.: Set to High.
Initial Pairing Process (First-Time Connection)
This process establishes the wireless connection between your Sony camera and Evoto on your desktop.
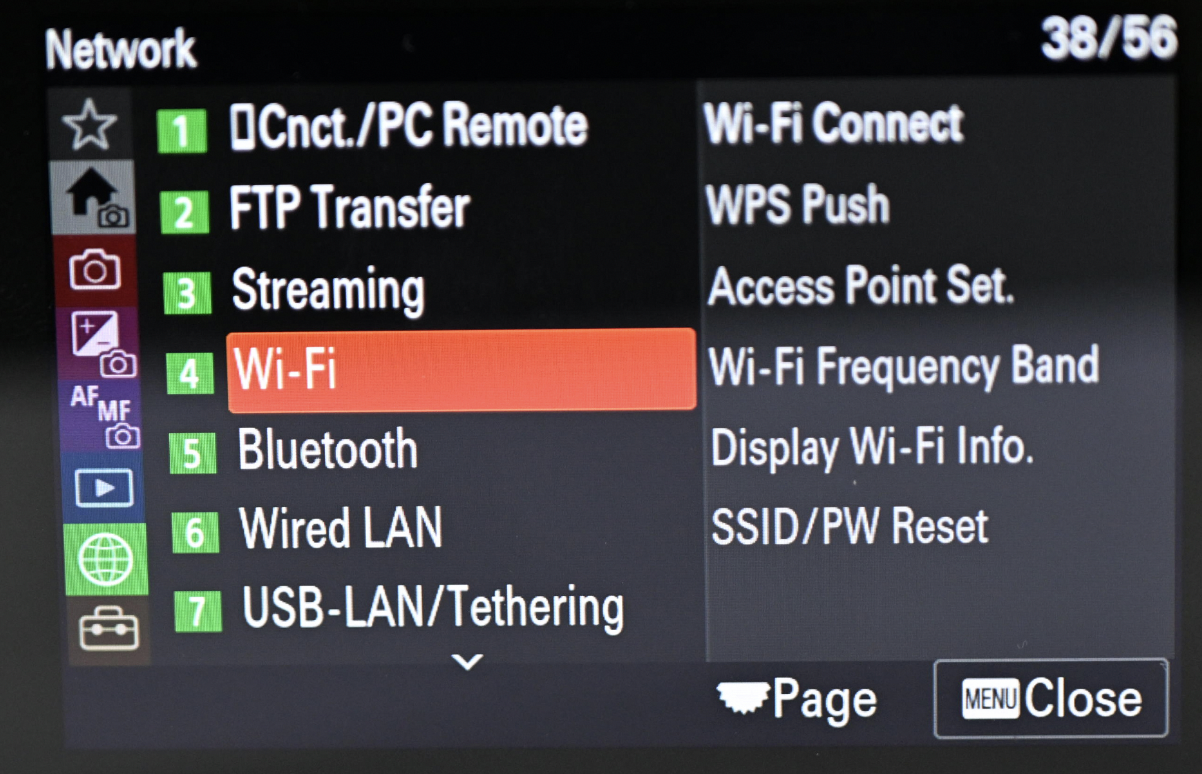
- Enable Wi-Fi: On the camera, go to Menu → Network → Wi-Fi and set Wi-Fi Connection to On.
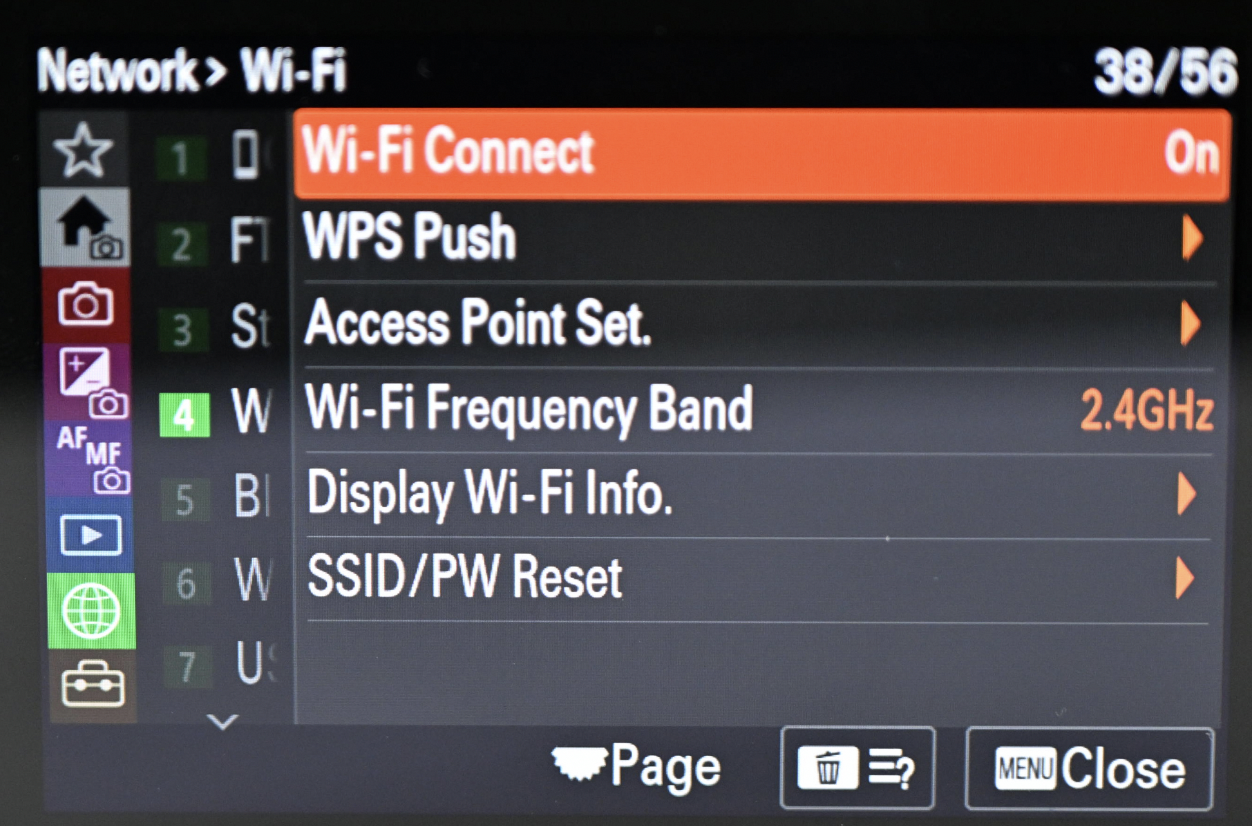
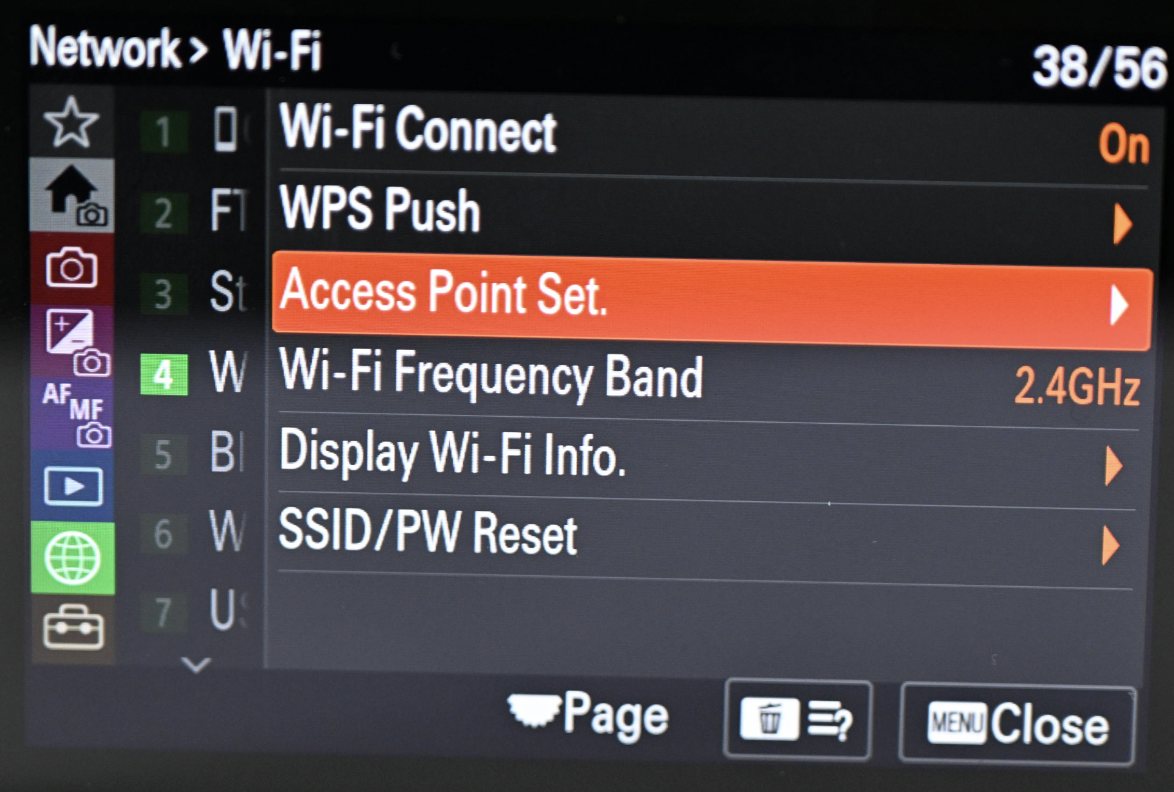
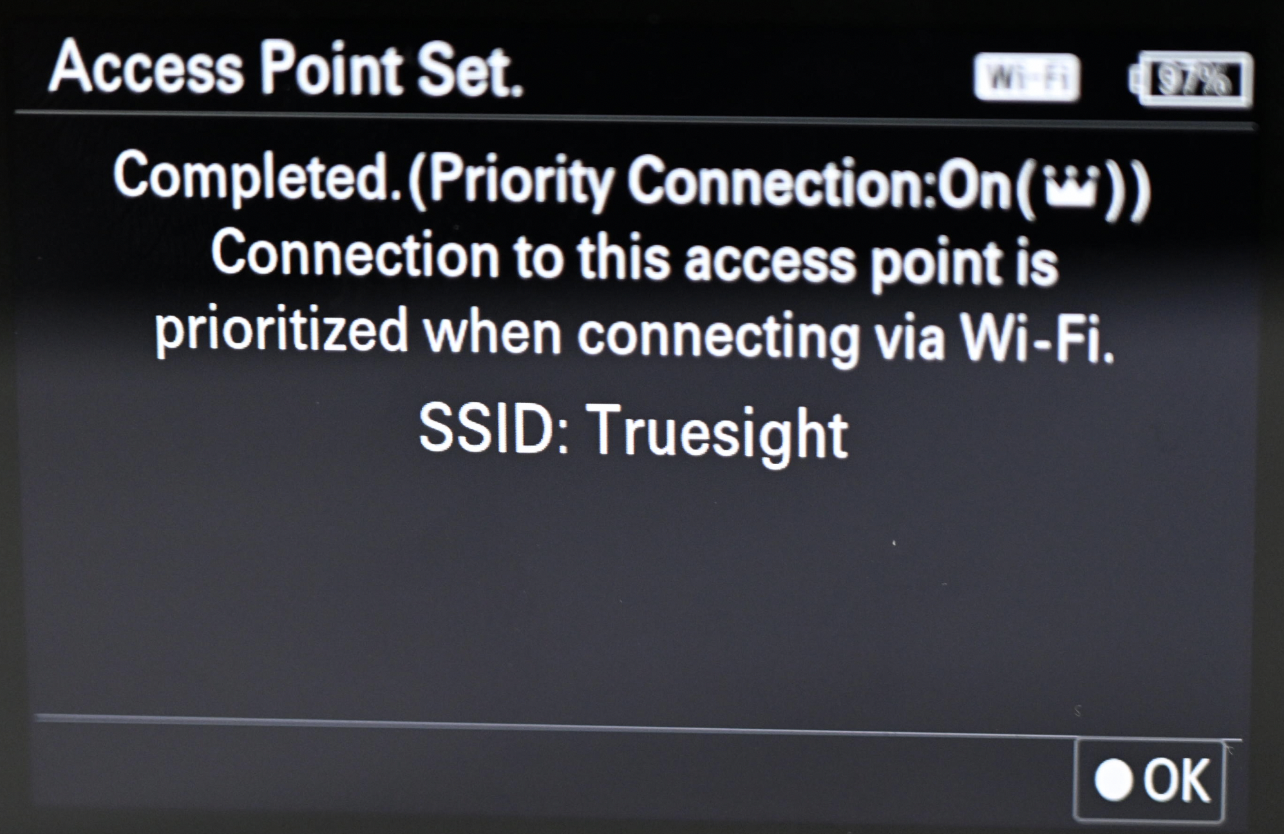
- Connect to Wi-Fi: Under Access Point Set, select the Wi-Fi network (the same one the desktop is using) and enter the password.
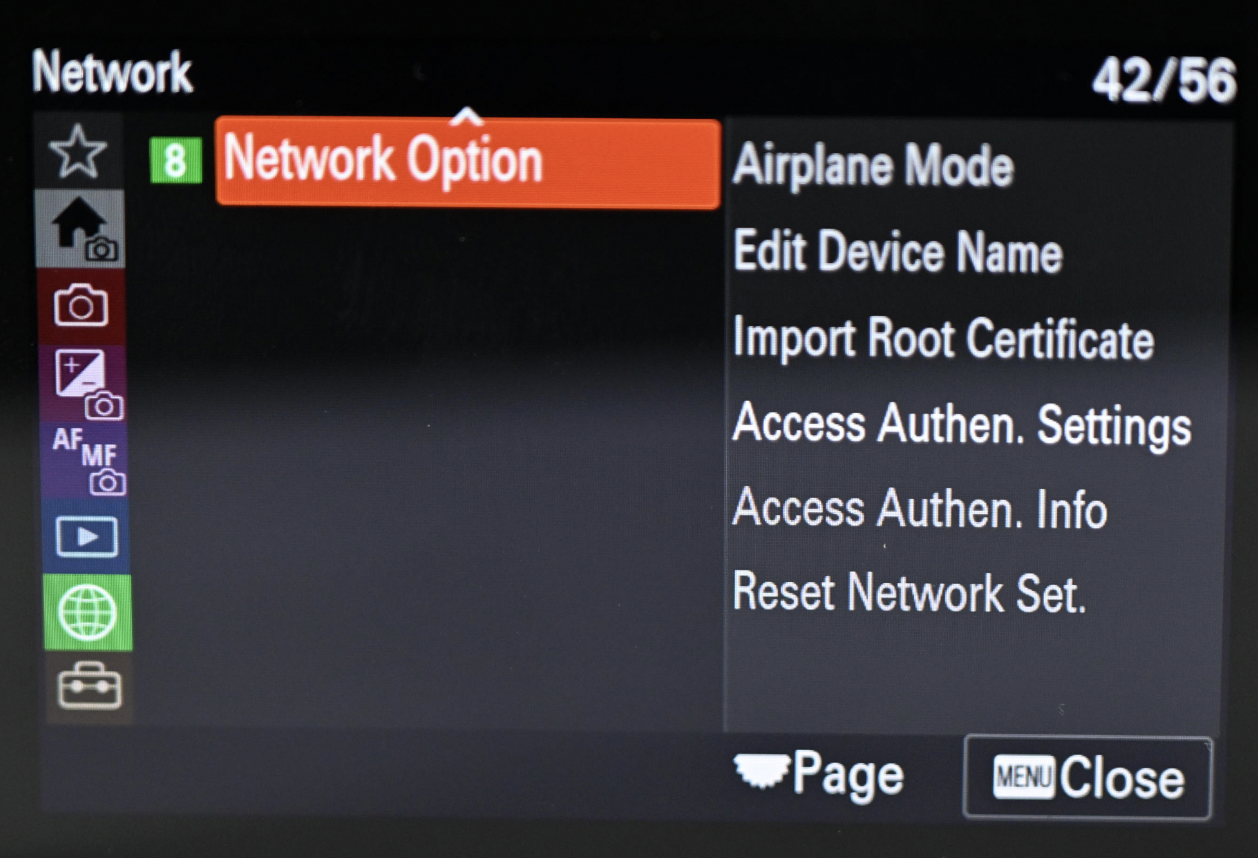
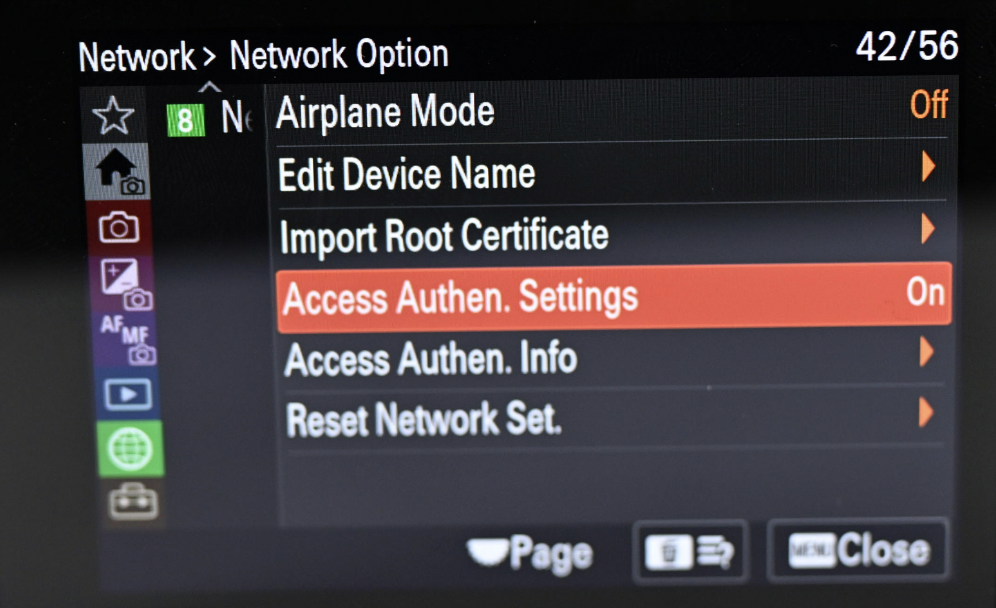
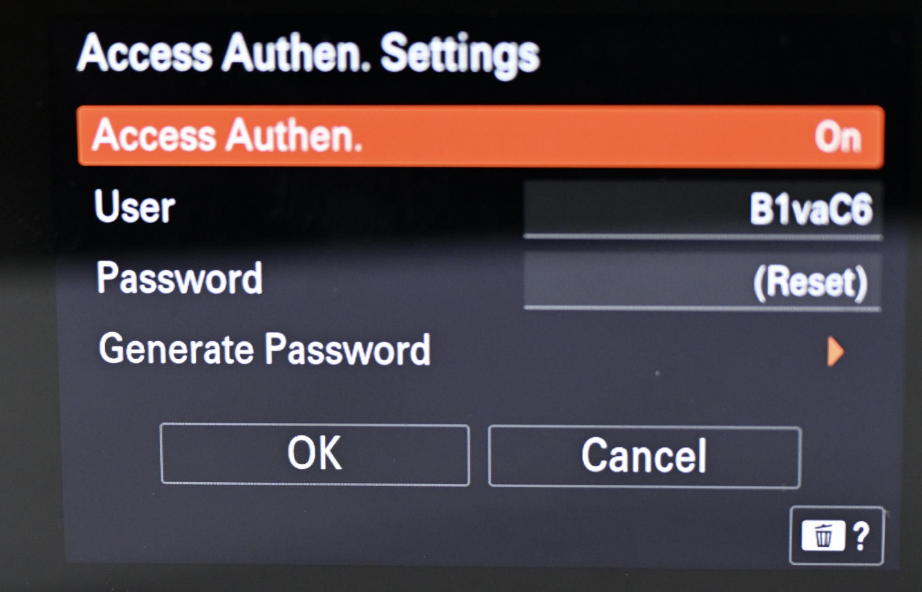
- Adjust Authentication Settings: Go back to Network → Network Options, set Access Authen. Settings to On, and confirm.
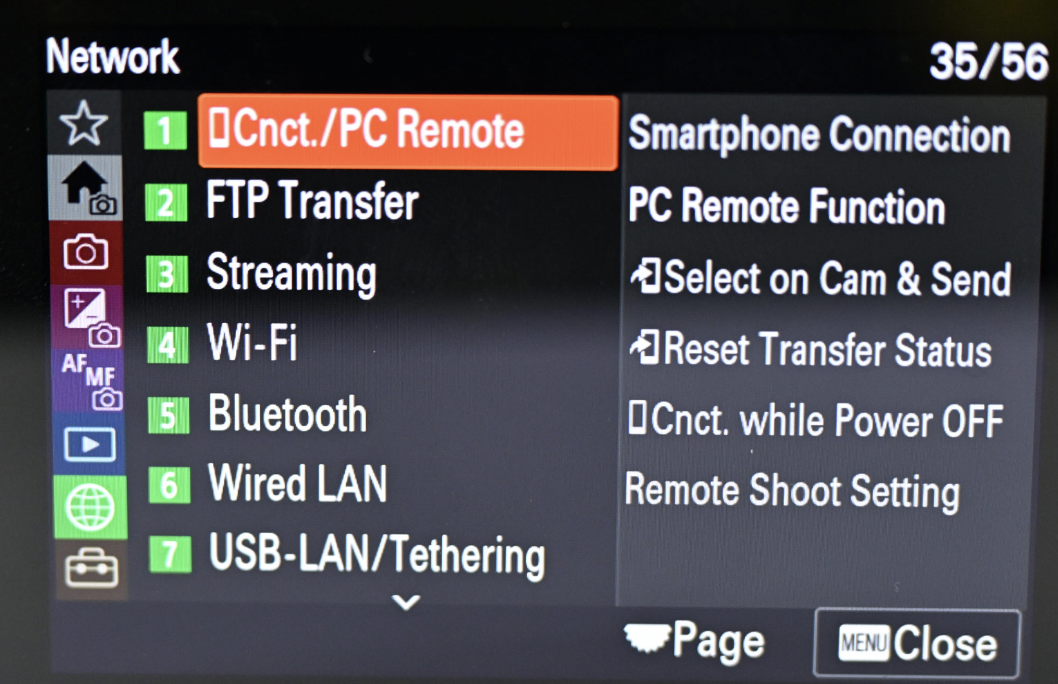
- Enable Wireless Remote Mode: Navigate to Smartphone Cnct./PC Remote → PC Remote Function and switch PC Remote to On.
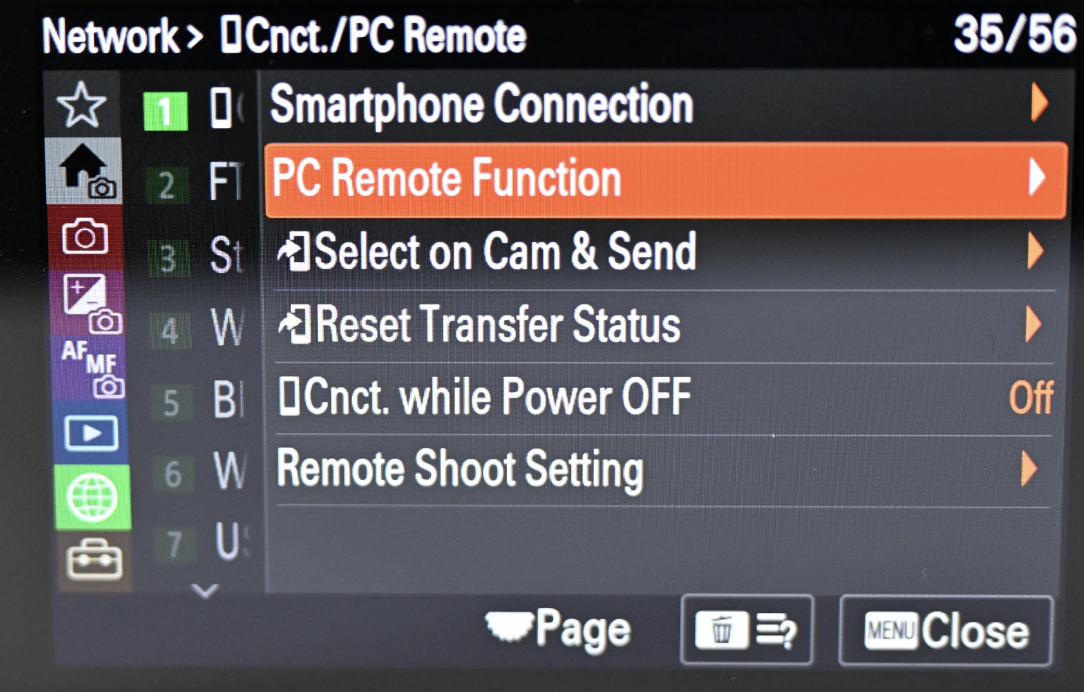
- CA pairing request will appear on the camera screen—tap OK to complete the pairing.
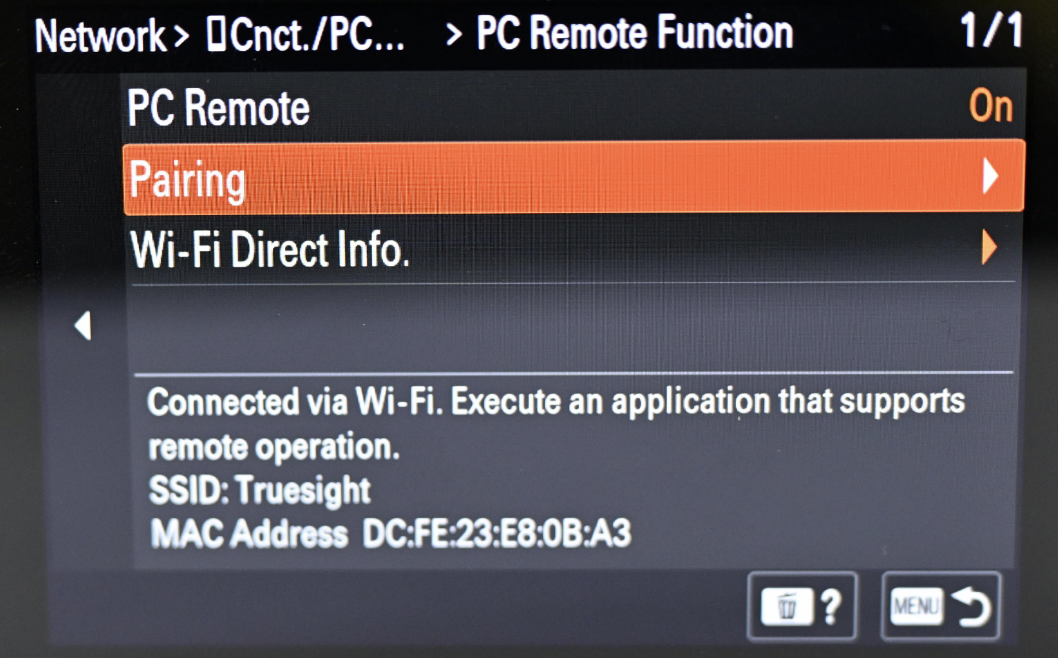
- Pair with Evoto:
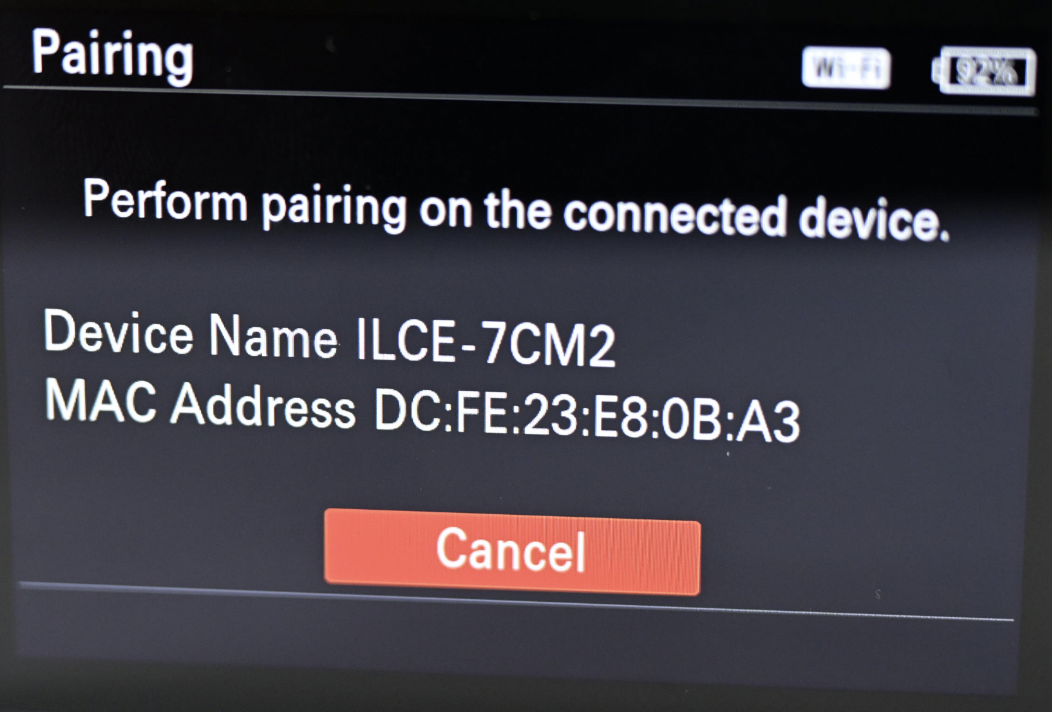
- Select Pairing on the camera.
- On the desktop, open Evoto, go to the Tethered Shooting interface, and select the matching Sony camera model (e.g., “7CM2”).
- A pairing request will appear on the camera screen—tap OK to complete the pairing.
Important:
Attempting to connect Evoto to the camera without completing this initial pairing step first will result in a failed connection.
Compressed RAW is currently not supported. For Sony A7M5, Evoto supports uncompressed RAW and lossless compressed RAW formats only.
To check or change the RAW file type on the camera, go to:
Image Quality/Rec > RAW File Type
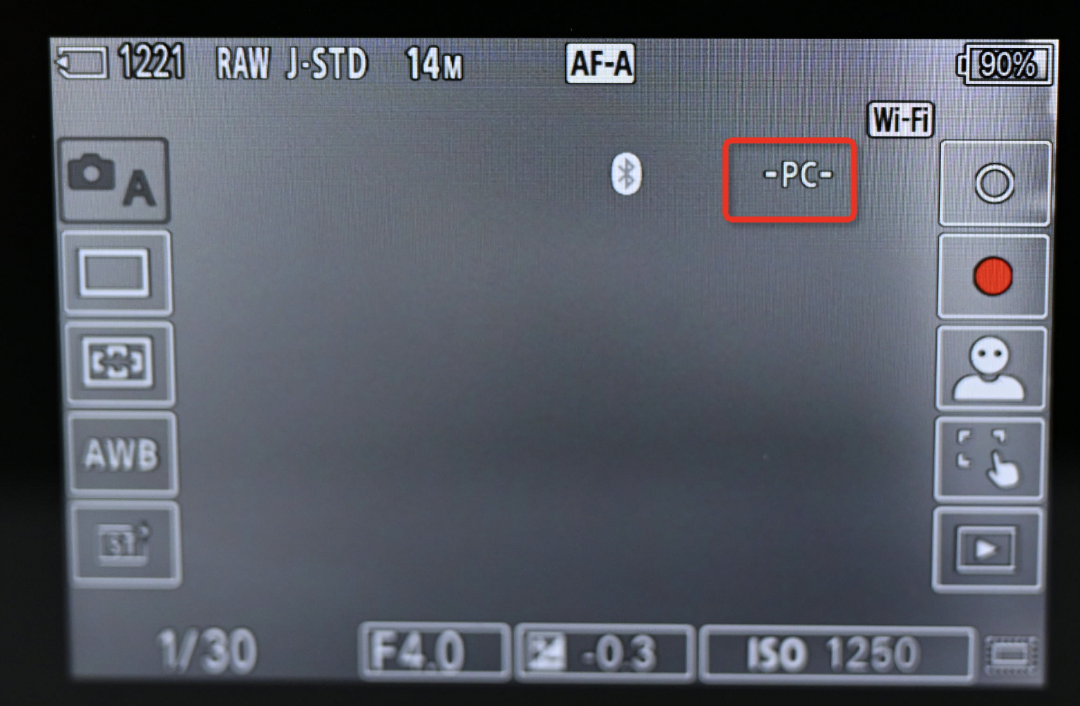
Subsequent Pairing (Reconnecting to an Already Paired Network)
After the initial setup, reconnecting for future sessions is simpler:
- Simply turn on PC Remote mode again on your camera. The camera will enter a standby state automatically.
- When the connection is established, the PC icon on the camera screen will change from red to white, indicating a successful connection with Evoto.
Camera Firmware Version
For optimal performance and compatibility, ensure your Sony camera is running the latest firmware version. Firmware updates often include bug fixes, performance improvements, and enhanced wireless tethering stability.
- To check your firmware version: Navigate through your camera’s menu, typically under a Setup → Version section.
- To update firmware: Visit Sony’s official support website, locate your specific camera model, and follow their instructions for downloading and installing the latest firmware.


