The Color Adjustment module in Evoto for iPad allows precise and creative control over image tonality and color. You can open or close the Color Adjustments panel by tapping its icon.

Histogram
The histogram visually represents the distribution of image brightness:
- Shadows — Left side of the graph
- Mid-tones — Center of the graph
- Highlights — Right side of the graph
By analyzing the histogram, you can determine whether your image contains sufficient shadow, mid-tone, and highlight detail. It also helps you identify tonal characteristics:
- Low-Key Image — Details concentrated in shadows
- High-Key Image — Details concentrated in highlights
- Average-Key Image — Balanced mid-tones
- Full Tonal Range — Spread across the full histogram
Note: The histogram floats at the top of the preview screen and can be repositioned as needed.

AI Color Looks
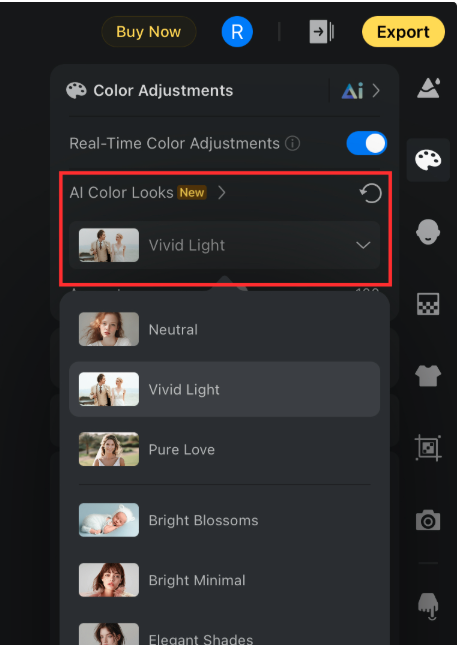
- The first time you apply an AI Color Look, a loading screen will appear.
- Once applied, the dropdown menu stays open for fast comparison and switching.
- The menu closes only when you tap outside it.
See the full introduction for AI Color Looks in the main feature guide.
AI Color Match
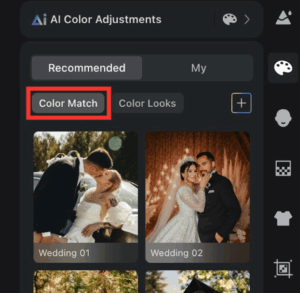
AI Color Match is a powerful feature that allows you to automatically transfer the unique tone and overall visual style from a chosen reference image to another image or a group of photos. It intelligently adjusts elements like exposure, white balance, tonal range, and even subtle local details.
A key differentiator of AI Color Match is its semantic recognition capability. This means it can identify and precisely adjust specific elements such as skin tones, hair color, clothing, and environmental features like skies or indoor lighting, ensuring a more natural and cohesive look across all your images.
Reference Styles
Evoto provides two categories for managing your AI Color Match references:
- Recommended: Explore 12 built-in color match styles, officially curated by Evoto. These cover a variety of common scenes, including school, wedding, and family settings, and offer diverse visual aesthetics to suit various creative needs.
- My Samples: This is your personal library where you can import your own reference images or save the current preview image as a custom reference sample.
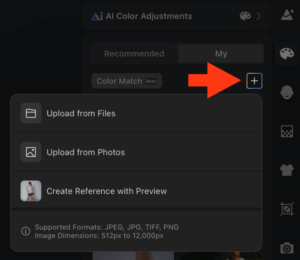
Managing Custom Reference Samples
After applying any custom reference sample, you can long-press the image to access additional options:
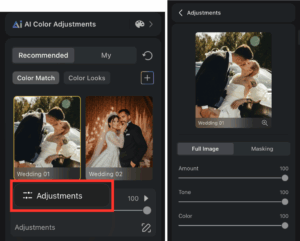
- Adjustments: Tap to fine-tune the applied effect manually, either for the entire image or for specific areas, giving you precise control over the final look.
- Rename: Easily change the name of your custom reference sample.
- Delete: Permanently remove a custom reference sample from your library.
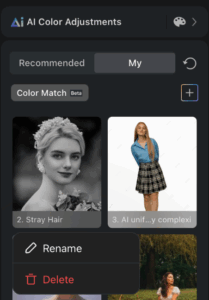
Note: Once an AI Color Match style is applied, the main Color Adjustment panel will temporarily display only the currently active style. To view or switch to other reference images, simply tap the arrow on the right to return to the AI Color Match panel.
Masking
The Masking feature separates adjustments for the Person and Background:- By default, the Person tab is selected first. A red overlay mask appears to indicate the selected subject.
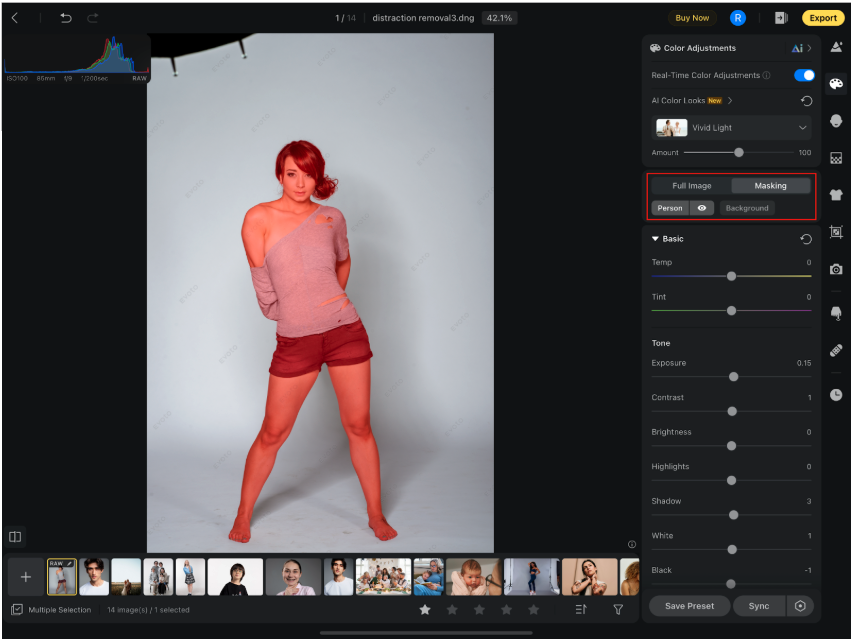
- The red mask disappears as you begin making adjustments.
- An eye icon appears next to the mask tab:
- Toggle Off: Hides the effect
- Any Slider Adjustment: Reactivates the effect
- Toggle Off: Hides the effect
Local color adjustments include:
-
- Basic
- Curves (except parametric curves)
- HSL
- Color Grading
- Basic
Real-Time Color Adjustments
This feature focuses on real-time color editing by temporarily hiding non-color-related effects to improve performance.
- Enabled by default
- Can be manually turned off
- A prompt will appear on first use; tap “Don’t show this again” to disable future notifications

Filters
Evoto for iPad offers a wide selection of filters, categorized for creative flexibility. Each filter includes a slider for intensity adjustment.
- Tap More to view additional filters.
Filter Categories:
- Portrait Filters – Soften imperfections and highlight natural beauty.

- Cinematic Filters – Apply dramatic, film-inspired color grading.

- Lifestyle Filters – Add bright, vibrant tones ideal for everyday moments.

- Landscape Filters – Enhance natural color in outdoor scenes.

- Vibe Filters – Create retro, edgy, or artistic effects.

- Black & White Filters – Emphasize contrast and detail by removing color.

Basic Adjustments
Includes essential color and tone controls:
White Balance
Adjusts for lighting color to ensure neutral whites:
- As Shot – Use original camera setting
- Auto – Available for RAW files; auto-adjusts to light source

Presets
- Daylight
- Cloudy
- Shade
- Tungsten
- Fluorescent
- Flash

Sliders
- Temp — Adjust warm (yellow) vs. cool (blue)
- Tint — Adjust green vs. magenta balance
Tone
Control the brightness, contrast, and depth of your image:
- Exposure – Adjusts overall lightness or darkness
- Contrast – Increases vibrancy or softens the image
- Brightness – Boosts light evenly while maintaining contrast
- Highlight – Adjusts bright areas
- Shadow – Adjusts dark areas
- White – Affects the brightest pixels
- Black – Affects the darkest pixels
- Clarity – Sharpens fine detail or softens the image
- Dehaze – Reduces atmospheric haze, fog, or light scatter (Note: The Dehaze effect is intentionally strong. It is generally recommended to avoid using very high values on the slider to maintain a balanced and natural-looking result).
- Vibrance – Enhances muted tones without over-saturating
- Saturation – Controls overall color intensity
Curves
Modify tonal values with advanced precision.
Curve Types
- Parametric Curve – Divided into shadows, darks, lights, and highlights; controlled via sliders
- RGB Curve / Luma Curve / R/G/B Channels – Add up to 16 control points for precise adjustments
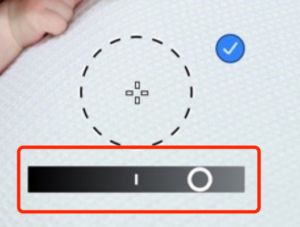
On-image Adjustment Tool
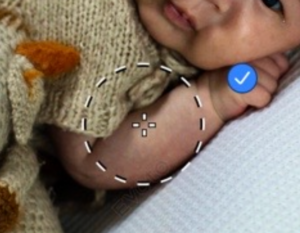
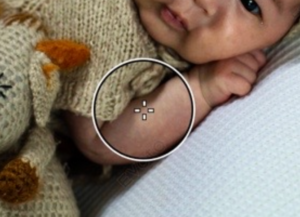
- Tap on the image to add and adjust control points
- Dashed lines — Preview adjustment range
- Solid lines — Confirmed control points
- Hover with Apple Pencil or mouse for interactive feedback
- Long press curve icons to reset a channel or all curves
HSL (Hue, Saturation, Luminance)
The HSL color adjustment panel allows you to fine-tune specific color ranges in your image by modifying three key properties:
- Hue – Controls the base color on the color wheel (such as red, green, or blue). Adjusting the Hue slider shifts each color toward a neighboring tone, allowing you to change the overall color cast of that range.
- Saturation – Adjusts the intensity or vividness of a color. Increasing saturation makes the color more vibrant, while decreasing it results in a more muted appearance. This is useful for emphasizing or softening specific colors.
- Luminance – Alters the brightness of a color without changing its hue or saturation. Raising the luminance lightens the selected color, while lowering it darkens it—ideal for creating contrast and visual balance.
Evoto for iPad provides controls for 8 individual color ranges: Red, Orange, Yellow, Green, Aqua, Blue, Purple, and Magenta.
By adjusting the HSL sliders, you can achieve subtle color refinement or dramatic stylistic effects with precision.
Color Grading
Apply creative color grading using four color wheels:
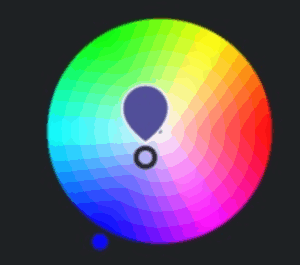
The Color Grading tool offers four color wheels; Shadows, Midtones, Highlights, and Global. These are to help you fine-tune the color tones throughout your image.
When adjusting Hue or Saturation using either the sliders or the wheel interface, a hue tag indicator appears for precise control.
Each color wheel includes the following sliders:
- Hue: Range 0–360 (default: 0)
- Saturation: Range 0–100 (default: 0)
- Luminance: Range -100 to +100 (default: 0)
For Shadows, Midtones, and Highlights, two additional controls are available:
- Blending: Controls the overlap between tonal ranges (0–100, default: 50)
- Balance: Adjusts the weighting between shadows and highlights (-100 to +100, default: 0)
Keyboard Integration
- Hold Shift to show an auxiliary line for fine-tuning saturation on the color wheel.
- Long press the Color Wheel icon to reset an individual wheel or all settings at once.
Detail
Sharpen
The Sharpen tool enhances the clarity and definition of your image by emphasizing edges and fine details.
- Sharpen – Increases overall image sharpness, making textures and edges appear more defined.
- Radius – Determines the width of the sharpening effect around edges. A larger radius affects a broader area, while a smaller radius targets fine edges more precisely.
- Detail -Controls how much fine detail is emphasized. Higher values retain more small details and texture, while lower values result in smoother transitions and a subtler sharpening effect.
Use these controls together to fine-tune the sharpness of your image without introducing unwanted artifacts.

Noise Reduction
The Noise Reduction tool helps clean up your image by minimizing visual noise, especially in low-light or high-ISO photos, resulting in a smoother and more natural appearance.
- Noise Reduction – Reduces overall noise in the image, helping to produce a cleaner, clearer result.
- Detail – Controls how much fine detail is preserved during noise reduction. Use a higher value for stronger noise removal in heavily affected images. For cleaner images or when detail preservation is critical, use a lower value.
- Contrast – Adjusts how noise blends with surrounding areas. Increasing this value helps reduce the visibility of noise by making it more uniform with nearby tones and textures.
These settings work together to strike a balance between removing unwanted noise and retaining important image details.

Color Noise Reduction
Color Noise Reduction helps eliminate unwanted color speckles (also known as chroma noise), resulting in a cleaner and more visually pleasing image.
- Color Noise Reduction – Reduces blotchy color artifacts, especially in areas of flat color or shadow, to improve overall image clarity.
- Detail – Sets the threshold for preserving fine color detail. Higher values retain more edge color detail but may result in color staining. Lower values more aggressively remove stains but can lead to color bleeding in detailed areas.
- Smoothness – Controls the transition of colors in noisy areas. A higher value creates smoother transitions, making color noise easier to eliminate. However, this may also reduce overall color detail and sharpness.
Adjusting these sliders helps you balance clean color rendering with the preservation of important image details.

Grain
Add a stylistic grain texture to your photos for a film-inspired or artistic look. Grain can enhance mood and character, especially in portrait or black-and-white photography.
- Overall Grain Strength – Controls the overall intensity of the grain effect across the entire image.
- Shadows – Adjusts the amount of grain applied specifically to shadow areas, helping to maintain texture in darker regions.
- Midtones – Controls grain intensity in the midtone areas of the image, allowing for subtle or pronounced grain depending on your desired look.
- Highlights – Modulates grain in the brightest parts of the image, helping to balance grain visibility without overpowering highlight details.
- Size – Alters the size of individual grain particles. Smaller values create finer grain, while larger values produce a coarser effect.
- Roughness – Adjusts the texture of the grain, from smooth and subtle to more rugged and pronounced.
- Color Variation – Introduces subtle variations in grain color, simulating the look of real film grain. Increasing this can create a more organic and less uniform appearance.
These tools give you full control to customize the grain effect and tailor it to the tone and style of your image.

Lens Corrections
Correct image distortions based on camera and lens profiles.
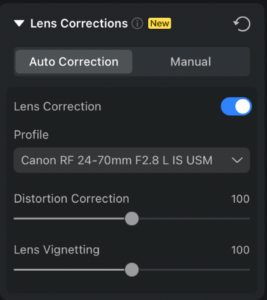
Auto Correction (for RAW Files)
Evoto includes advanced Lens Correction tools specifically optimized for RAW files. This feature is enabled automatically by default if the system accurately detects and matches the three key parameters from your RAW image: focal length, aperture, and subject distance.
Important: If your RAW image already contains an embedded lens profile, automatic correction will be disabled by default. In this scenario, the embedded profile will take priority and be used directly, even if the software’s parameters match precisely. Manual adjustments are also supported if needed.
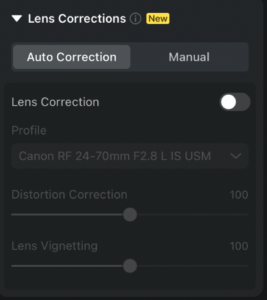
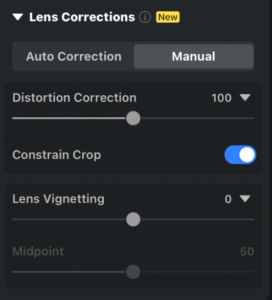
Manual Adjustment
- Distortion Correction – Adjusts barrel or pincushion distortion to keep straight lines straight and maintain accurate perspective.
- Constrain Crop – Ensures the image remains cropped appropriately during distortion correction. This helps preserve the original composition without leaving empty borders. This option can be enabled or disabled as needed.
- Lens Vignetting – Corrects darkening at the corners of the image caused by lens vignetting. Balances brightness across the frame for a more even and natural exposure.
- Midpoint – Adjusts the location of the vignette effect’s center point, allowing for finer control over how the brightness transition is distributed across the image.
Color Calibration
The Color Calibration tool allows you to adjust the Hue and Saturation of the three primary color channels (Red, Green, and Blue) for more accurate and natural-looking images.
- Red Primary
- Hue: Shifts red tones toward orange or magenta
- Saturation: Adjusts the vividness of reds
- Green Primary
- Hue: Shifts green tones toward yellow or cyan
- Saturation: Controls the intensity of greens
- Blue Primary
- Hue: Moves blue tones toward cyan or purple
- Saturation: Adjusts the strength of blues
These adjustments help correct unwanted color casts and enhance overall tonal accuracy, particularly in skin tones, product photography, and natural scenes.


