Histogram
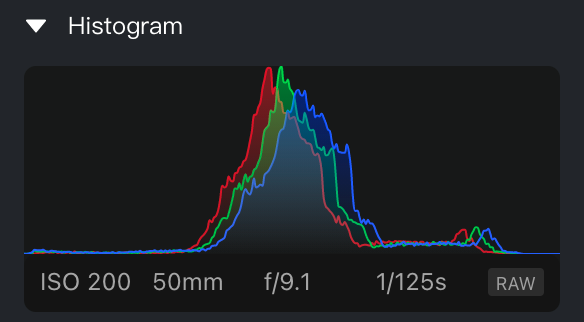
The Histogram is a graphical tool that visualizes the distribution of brightness levels in an image. The horizontal axis represents brightness levels from pure black (0) to pure white (255), while the vertical axis shows the number of pixels at each brightness level.
By reviewing the histogram, you can assess the exposure and tonal balance of your image, helping you make more informed adjustments to brightness, contrast, and overall color.
RGB / Lab Color Check

- Purpose: Designed for professional color workflows, especially in e-commerce.
- Function: Toggle between RGB and Lab color under:
Color Adjustment → Histogram → Three Dot icon

Lab color space offers more device-independent accuracy and human-perceived consistency.
Real-Time Color Adjustments
The Real-Time Color Adjustment feature allows you to preview only the color-related changes you’ve made, temporarily hiding all other adjustments that are not related to color. This can be especially helpful when fine-tuning color grading or assessing the impact of specific color edits.

- Enabled: Displays only color adjustments and hides all other effects.
- Disabled: Displays all applied effects in the image.
This feature also supports full-size previews. When activated, the image in the color adjustment panel will appear at full resolution.
To enable full-size preview
Go to Settings –> Preview and toggle on Show Full-Size Preview for Real-Time Adjustments.
AI Color Adjustments
AI Color Tools

Auto Color Corrections
This feature automatically calibrates the white balance and exposure of the currently selected image.
How to Use
Select an image. Click “Apply”. The AI Auto White Balance and AI Auto Exposure tools (magic wand icons) will be activated automatically.
Notes: Enabling this feature will overwrite any previous white balance and exposure adjustments made to the selected image.
Multi-Image Color Consistency

This feature uses the selected image as a reference and adjusts the color parameters of the other selected images to match it, ensuring consistent color tones across the group.
Background Color Consistency
Background Color Consistency is used to align background tone, brightness, and saturation across a set of images. It is especially useful for studio ID photos, business portraits, school photography, headshots, and other workflows that require highly consistent backgrounds. This feature applies to the background only.
Note: If you later apply AI Color Match, AI Color Looks, or other style-based color effects, the result may be cleared. Images smaller than 256 px and images with transparent backgrounds are not supported.
How to Use
- In the Edit interface, select multiple images and click “Match”. The system will adjust the color parameters of all selected images based on the reference image.
Notes
- This feature is designed for achieving color consistency among photos taken in the same scene, so multiple images must be selected.
- Using this feature will overwrite the existing color adjustments of the selected images (such as white balance, HSL, and curves). Some parameters, such as Lens Correction and Grain, will be preserved.
Recommended Workflow
- Apply AI Style adjustments (such as AI Color Looks or AI Color Match) first, then use AI Color Tools (including Multi-Image Color Consistency and Auto Color Corrections).
- Apply Auto Color Corrections before using Multi-Image Color Consistency.
AI Style
AI Color Looks
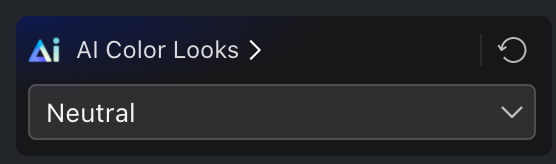
The AI Color Looks feature offers intelligently generated color grading styles that instantly elevate your photos with visually appealing color tones. These adjustments are tailored to your selected style, helping your work stand out with minimal effort.
This feature has been upgraded to better highlight the subject in the image, often eliminating the need for users to create local masks.
For a full overview of capabilities, refer to the AI Color Looks Introduction
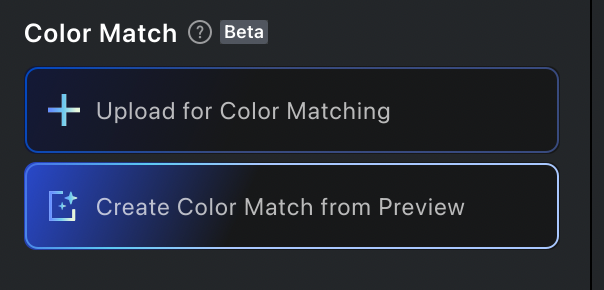
AI Color Match
AI Color Match allows you to match the color style of one photo to another. Simply upload a reference image, and Evoto’s algorithm will automatically apply a similar color treatment to your target image, streamlining your workflow and reducing the time spent on manual grading.
For full details, refer to the AI Color Match Introduction
Masking

Profile
When you import a preset that includes LUT-based color reference information, Evoto will automatically create a Profile to reflect the embedded LUT. This Profile defines the type of color filter used and how it alters the colors in your image.
- By default, the Standard Profile is used unless a custom LUT profile is applied.
- LUTs can enhance or completely shift the tone and mood of your photos.
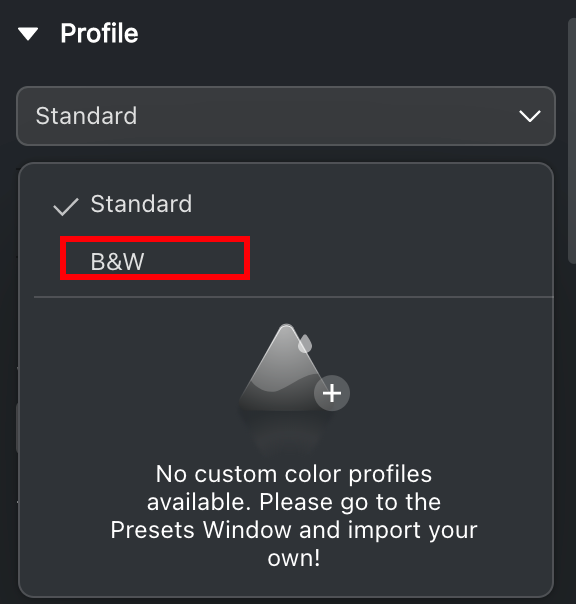
Black & White Mode
Evoto supports Black & White (B&W) image processing through the Profile settings.
To enable:
- Go to Color Adjustment → Profile
- Select B&W
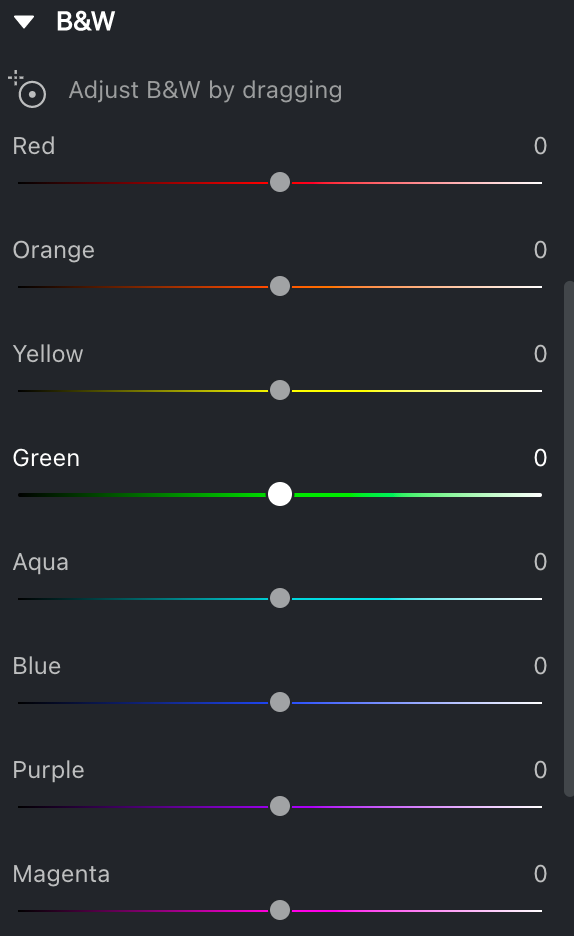
Once enabled:
- Your image will convert to black and white
- Some color-specific adjustments will be disabled:
- Under Color Adjustment → Basic, the Vibrance and Saturation sliders will be greyed out
- Under Background Adjustment → Sky Replacement, the Temp and Saturation sliders will also be disabled
- Under Color Adjustment → Basic, the Vibrance and Saturation sliders will be greyed out
- The HSL (Hue, Saturation, Luminance) controls will be replaced by a B&W adjustment group designed for grayscale image control
Filters
Evoto offers a wide range of filters that can be directly applied to your photos to create stylized effects or color themes.
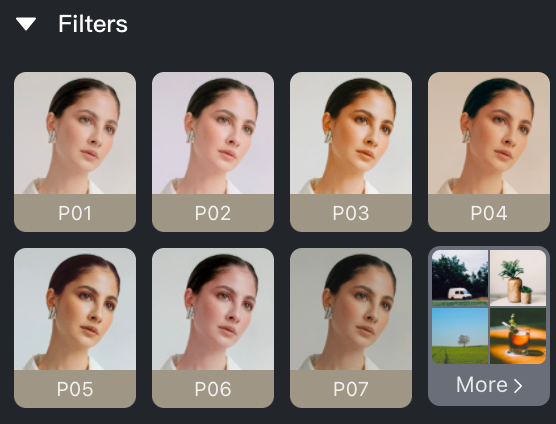
- Each filter’s intensity can be adjusted using a slider
- Click More to explore the full range of available filters
- Filters can be used in combination with other color adjustments for enhanced creative control
Basic
White Balance
White Balance ensures your images maintain natural-looking colors under different lighting conditions. It removes unwanted color casts by making white objects appear neutral and true to life.
AI White Balance Adjustment
When enabled, this tool analyzes the image and automatically adjusts the Temperature and Tint sliders to achieve a natural white balance. This ensures colors appear accurate and consistent without manual correction.

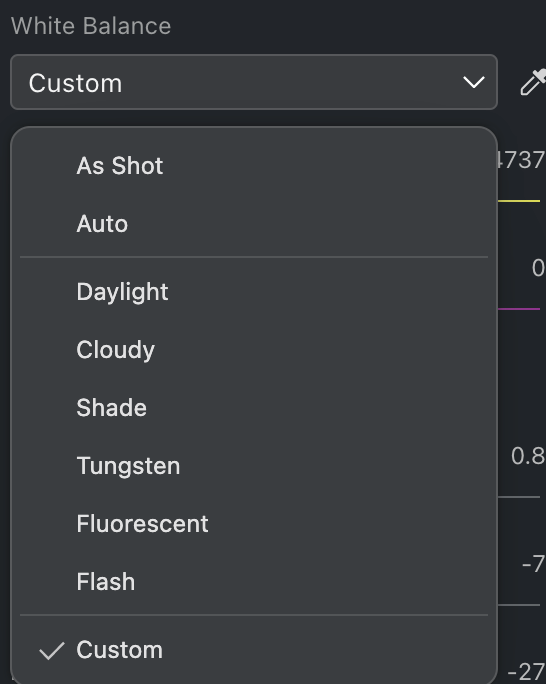
Auto White Balance
Evoto provides several white balance presets for RAW files:
- Auto: Automatically analyzes and adjusts for natural color tones
- Daylight: Optimized for bright, outdoor sunlight
- Cloudy: Warms up images taken under overcast skies
- Shade: Compensates for cooler tones in shaded areas
- Tungsten: Adjusts for the yellow cast of incandescent light
- Fluorescent: Balances the green or blue tint from fluorescent lights
- Flash: Corrects color when using a flash
White Balance Selector
The White Balance Selector tool lets you manually correct the color temperature and tint of your image:
- Click on an area that should appear neutral white or grey (e.g., white clothing or walls)
- Evoto analyzes the selected area and adjusts the image accordingly to balance the tones and correct color shifts
You can click a single point or drag to select a region. This provides greater accuracy, especially in scenes with mixed lighting.
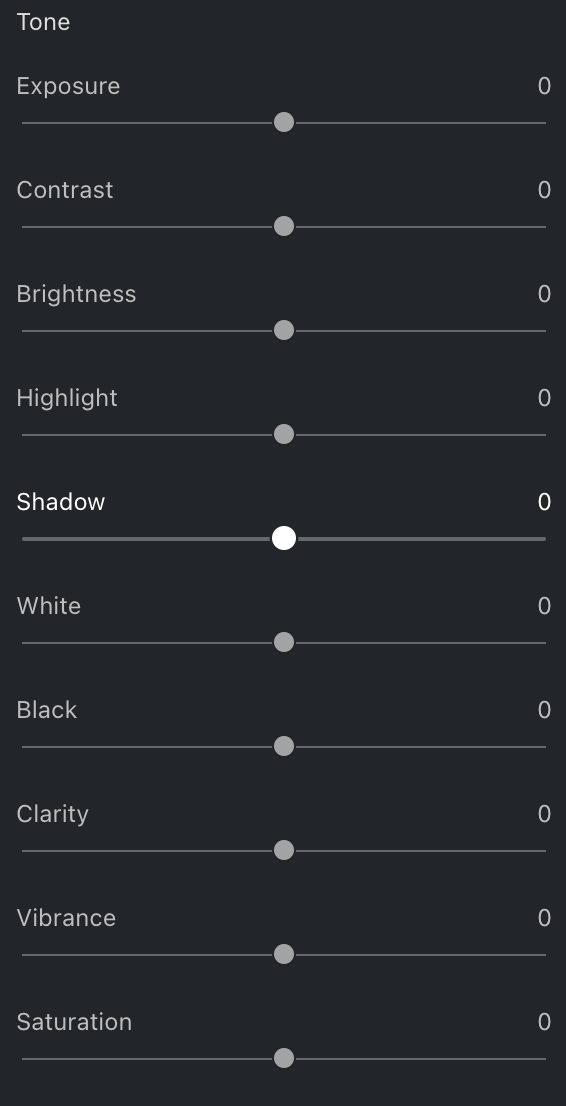
Tone
Tone plays a central role in photography, influencing the distribution of light and dark areas as well as the overall contrast and mood of an image. Proper tone adjustment can elevate the visual appeal, emphasize emotion, and add depth to your photos. Natural photographs typically feature a range of tones—shadows (darker areas), midtones, and highlights (brighter areas)—that create a layered and compelling composition.
AI Exposure Adjustment
This feature automatically adjusts the Exposure setting based on the brightness of your image. It provides a fast solution to correct underexposed or overexposed photos, giving you a proper starting point for further editing.

Tone Adjustment Controls
- Exposure: Controls the overall lightness or darkness of the image. Adjusting this slider affects the entire image and can significantly improve clarity and quality.
- Contrast: Increasing contrast enhances the difference between light and dark areas, adding vibrancy. Decreasing contrast softens the image and can reveal more subtle textures and details.
- Brightness: Adjusts midtone brightness while maintaining contrast. This produces a more natural and uniform enhancement compared to exposure adjustments.
- Highlight: Adjusts the intensity and tone of the brightest parts of the image, allowing control over light sources or reflective areas.
- Shadow: Adjusts the intensity and tone of the darkest parts of the image, helping to recover detail in shadowed areas or deepen contrast.
- White: Targets the very brightest pixels, affecting overall image luminance.
- Black: Targets the darkest pixels, allowing control over how deep the darkest areas of the photo appear.
Presence
Presence settings enhance the clarity, depth, and color dynamics of your image, making it appear more vivid or stylized based on your creative goals.
- Texture: Enhances or softens fine detail without shifting the overall light-and-shadow structure as aggressively as Clarity.
- Clarity: Increases midtone contrast, making the image appear sharper and more defined. Reducing clarity creates a softer, dreamier effect.
- Dehaze: Reduces atmospheric haze for a clearer and more detailed image. Drag the slider to the right for clarity and depth, or to the left for a soft, foggy appearance.
- Note: The Dehaze effect is intentionally strong. It’s best to avoid high values to maintain a balanced look.
- Note: The Dehaze effect is intentionally strong. It’s best to avoid high values to maintain a balanced look.
- Vibrance: Enhances less-saturated colors while preserving already vivid ones, resulting in more natural and balanced color enhancement.
- Saturation: Affects the overall color intensity. Lowering saturation mutes colors, while increasing it makes them more vivid and intense.
Level
The Levels feature can be used in both Full Image Color Correction and Local Color Adjustment. (Levels is also a free feature.) It enhances image depth and visual impact by precisely mapping the black point, white point, and neutral gray point — making dark areas cleaner, highlights more transparent, and midtone distribution clearer.
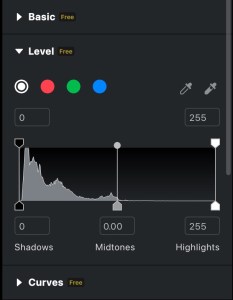
Module 1: Channel Switching & Color Sampling
- Channel Options: 4 channel options: RGB (joint adjustment), Red, Green, Blue. Histogram updates accordingly when switching channels.
- Eyedropper A: Sample black point grayscale (input black point).
- Eyedropper B: Sample white point color level (input white point). Click to pick the corresponding brightness point from the image.
Module 2: Input & Output Sliders
- Three bottom sliders for Input Levels — adjust by dragging or entering values directly.
- Two top sliders for Output Levels.
- Middle slider adjusts midtone brightness/gamma:
- Move right: Treats brighter areas as mid-gray → overall image darkens.
- Move left: Treats darker areas as mid-gray → overall image brightens.
Note: Levels supports synchronization and can be saved to presets.
Curves
The Curves feature group allows for precise tonal and color control by adjusting pixel brightness across the image. With up to 16 control points, you can fine-tune specific ranges like shadows, midtones, and highlights. Curves are ideal for advanced users looking to refine their images with precision.
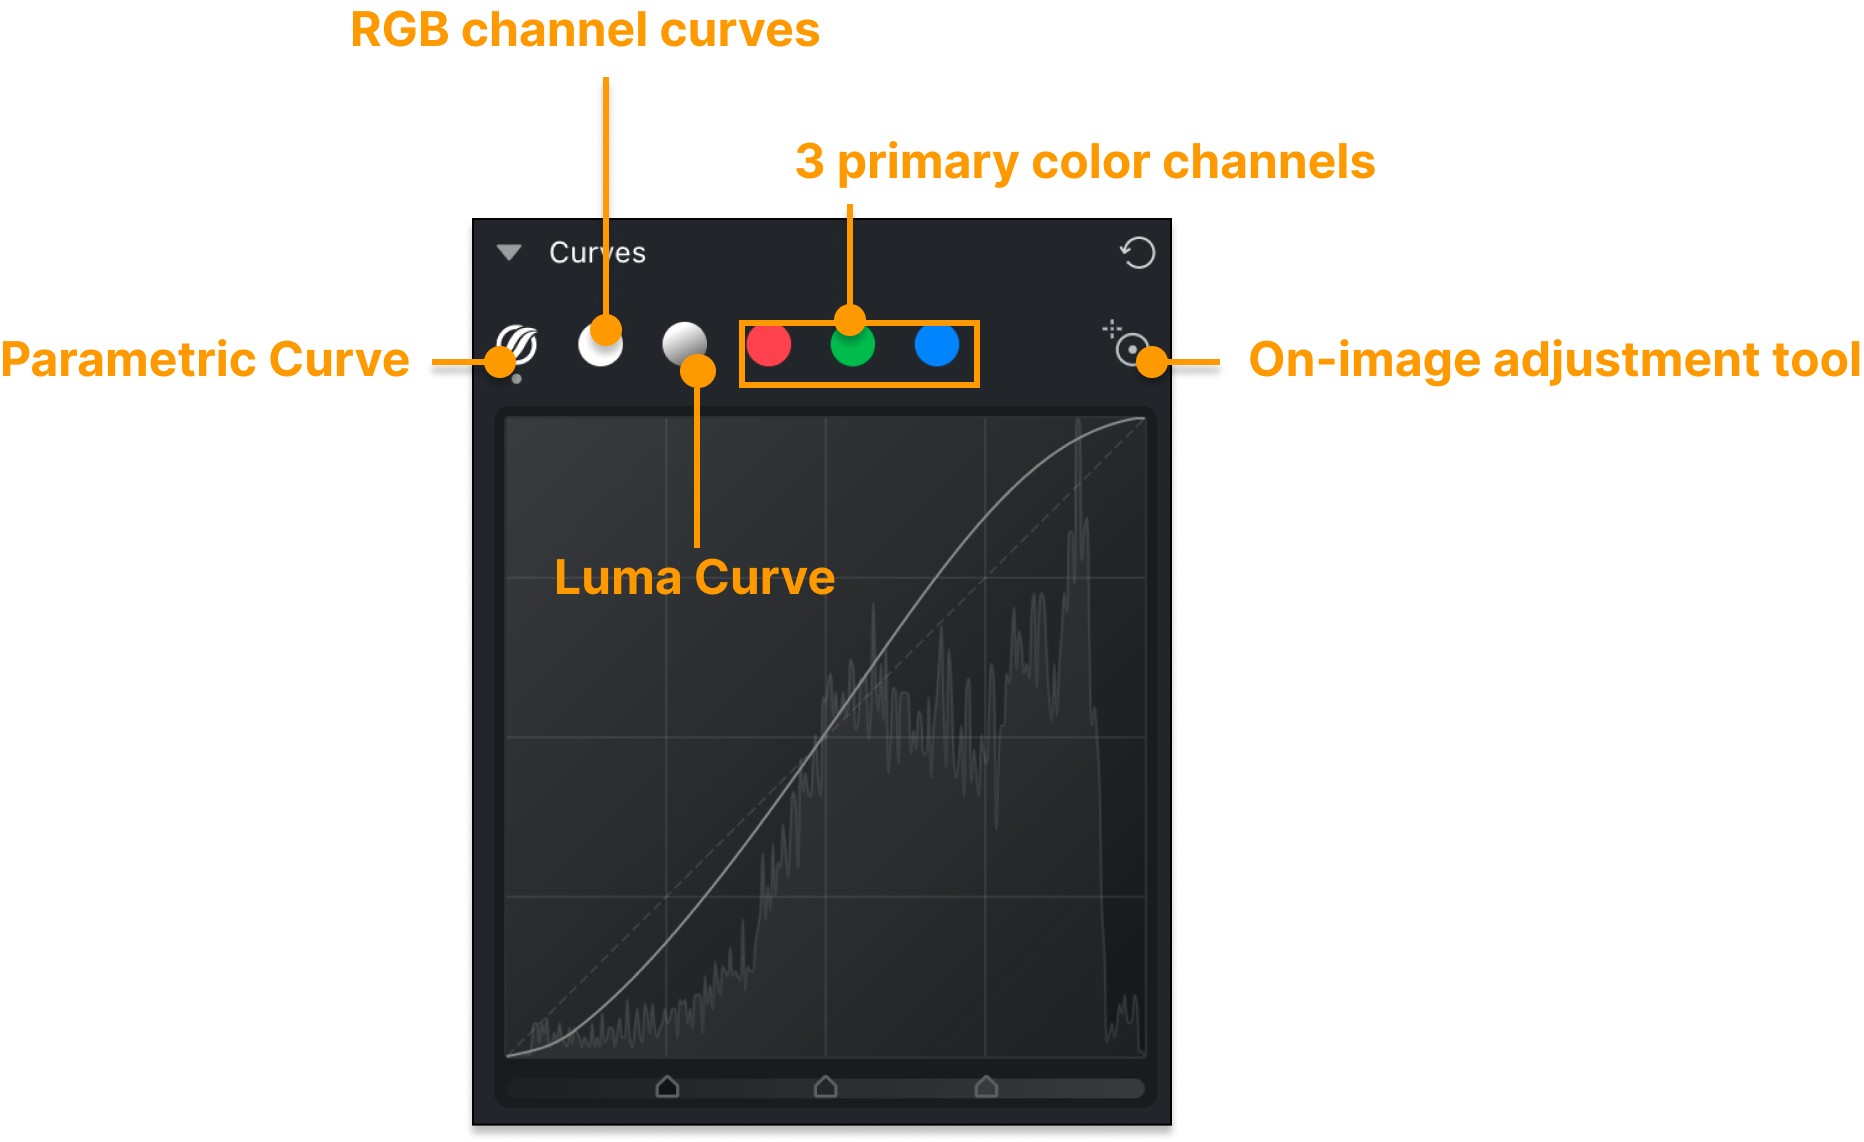
Curve Types
- Parametric Curve: Offers slider-based control over tonal ranges—highlights, lights, darks, and shadows—through a simplified interface.

- RGB Curve: Adjusts brightness and contrast across all three color channels (Red, Green, and Blue) simultaneously. Moving the curve upward brightens the image; downward darkens it.

- Luma Curve: A specialized brightness curve that adjusts luminance values while preserving color accuracy. You can adjust this curve using control points or the curve dropper tool.

- Single-Channel Curves: Allows independent editing of the Red, Green, and Blue channels for nuanced color correction or stylized looks.

Parametric Curve Controls

- Highlights: Controls the brightest areas. Increasing enhances intensity and detail in highlights; decreasing softens bright areas.
- Lights: Adjusts mid-bright areas. Raising the value makes these regions brighter and more defined; lowering adds depth.
- Darks: Affects darker midtones. Increasing reveals detail in shadowy areas; decreasing deepens shadows for contrast.
- Shadows: Controls the darkest portions. Brightening lifts shadow details; darkening enhances contrast and drama.
Curve Adjustment Tool
The Curve Adjustment Tool, also known as the On-Image Adjustment Tool, lets you click directly on areas of your image to adjust curves automatically based on the selected pixel. This simplifies curve editing and speeds up your workflow by eliminating the need to manually identify control points.
HSL (Hue, Saturation, Luminance)
The HSL module allows precise control over how each color appears in your image.
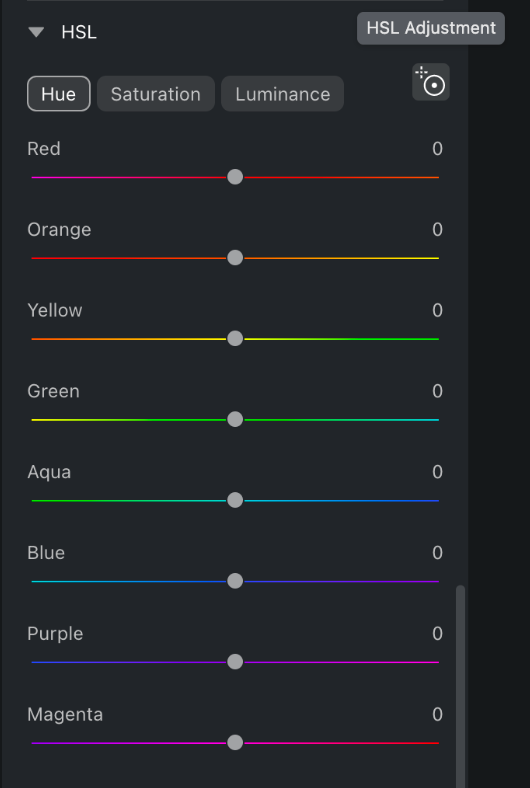
- Hue: adjusts where a color falls on the spectrum.
- Saturation: changes the intensity or purity of a color.
- Luminance: modifies the brightness of a color.
Evoto provides controls for eight color ranges: Red, Orange, Yellow, Green, Aqua, Blue, Purple, and Magenta.
HSL Selector Tool
An intuitive dropper tool lets you click on a specific color in your image to isolate and adjust its HSL values. Once selected, simply drag to fine-tune hue, saturation, and luminance directly from the image.

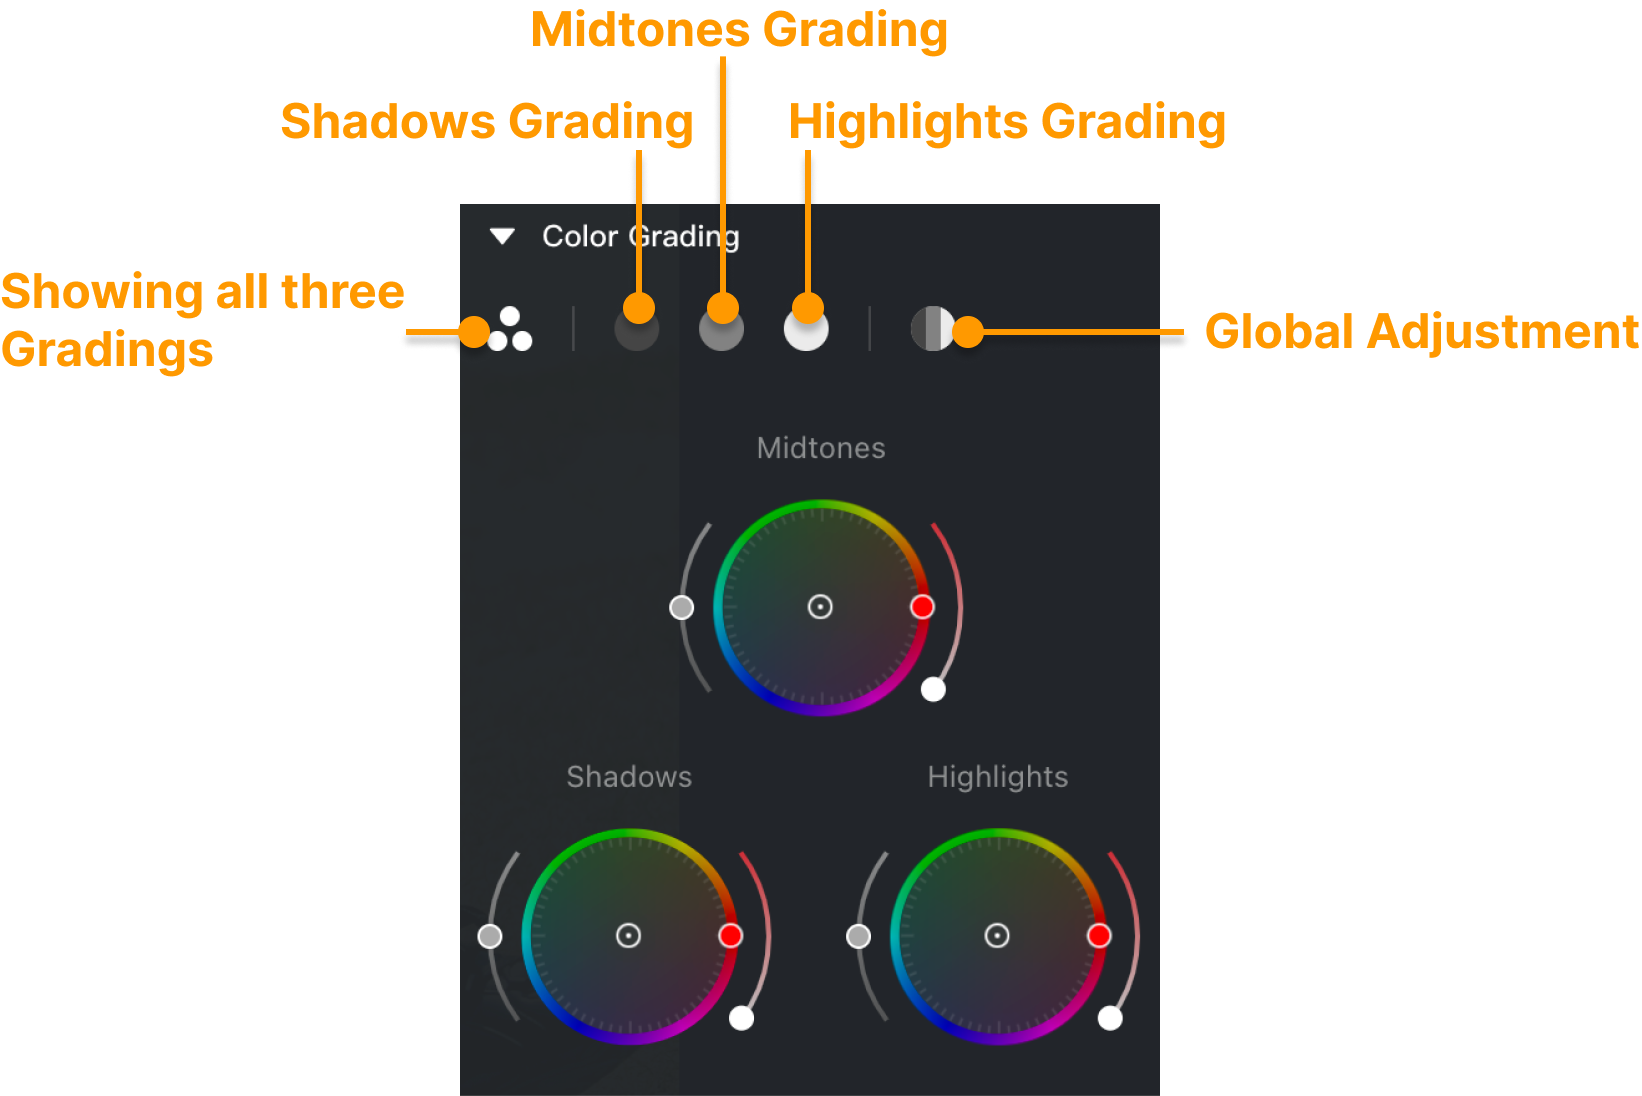
Color Grading
Color Grading allows you to adjust tones within three image zones—Highlights, Midtones, and Shadows—individually for greater creative control.
Drag the color point to shift tones; the closer to the center, the lower the saturation. Moving toward the edge increases saturation, letting you fine-tune subtle or dramatic effects.
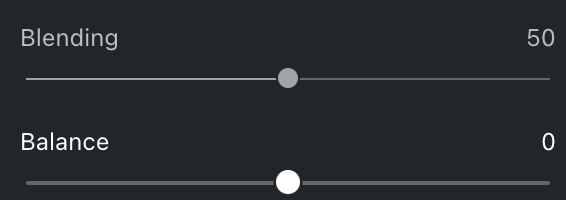
Blending and Balance
- Blending: Controls the smoothness of color transitions. A higher value results in more natural blending across tonal zones.
- Balance: Adjusts the weighting between highlights and shadows. A higher value increases the emphasis on highlights, while a lower value gives more weight to shadows.
Selective Color
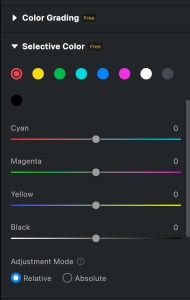
The Selective Color feature allows users to make precise adjustments to specific color ranges without affecting other colors. Based on the CMYK color model, users can independently adjust the CMYK components of 9 color channels.
Color Channels (9 total)
Reds, Yellows, Greens, Cyans, Blues, Magentas, Whites, Neutrals, Blacks
CMYK Adjustment Controls (4 slider sets)
- Cyan slider: -100 to +100 (positive adds cyan, negative adds red)
- Magenta slider: -100 to +100 (positive adds magenta, negative adds green)
- Yellow slider: -100 to +100 (positive adds yellow, negative adds blue)
- Black slider: -100 to +100 (positive darkens, negative brightens)
Adjustment Methods
- Relative (default): Adjusts proportionally based on existing color values — softer, more gradual results.
- Absolute: Applies direct absolute value adjustments — stronger, more noticeable effects.
Note: Supports batch synchronization of all 9 channel adjustments to multiple selected images. All adjustments can be saved as presets.
Detail
The Detail feature group provides controls to sharpen images and reduce unwanted noise for a clearer, more professional result.
AI Denoise
When enabled, AI automatically identifies noise and preserves details in the image, maintaining skin texture and contour details.
Notes:
-
This feature is only effective on RAW images.
-
A new copy of the image will be generated in Evoto’s proprietary RAW format (.evr), with the specified suffix added to its filename.
-
The new copy is a standalone image and can be edited independently of the original.
-
The new copy follows the same billing logic as the original image
.
Note: Sub-controls become available only after the main Sharpen or Noise Reduction sliders are adjusted.
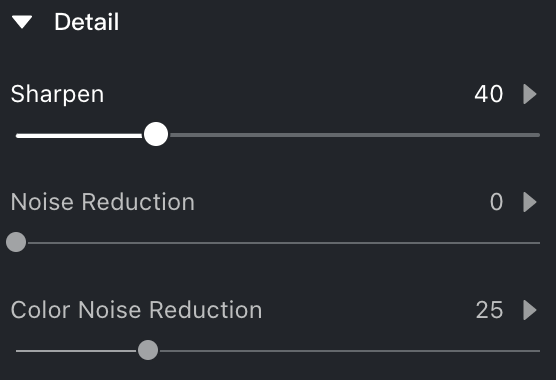
Sharpen
- Sharpen: Enhances edge contrast for a crisper, more defined image.
- Radius: Determines the width of sharpening around edges.
- Detail: Controls how much fine detail is enhanced. Higher values emphasize small details; lower values reduce the sharpening effect.
Noise Reduction
- Noise Reduction: Smooths out grain or digital noise in the image.
- Detail: Higher values remove noise more aggressively. Lower values preserve finer details.
- Contrast: Adjusts the balance between smoothed areas and preserved texture for more natural results.
Color Noise Reduction
- Color Noise Reduction: Eliminates color specks or blotches in low-light or high-ISO images.
- Detail: Sets the threshold for retaining edge color details versus removing color blotches. Higher values retain more detail but may cause color stains.
- Smoothness: Improves the softness of transitions between color areas. Higher values remove noise more effectively but may reduce edge definition.
Grain
The Grain feature lets you apply film-like texture for artistic or vintage effects. You can control how grain appears across tonal ranges and adjust its size, roughness, and color variation.
- Overall Grain Strength: Controls the intensity of the grain effect throughout the image.
- Shadows, Midtones, Highlights: Adjust grain intensity separately for each tonal range.
- Size: Changes the scale of the grain particles.
- Roughness: Controls how fine or coarse the grain appears.
- Color Variation: Introduces color noise variation into the grain, affecting visual texture.

Lens Corrections
Evoto includes advanced Lens Correction tools specifically optimized for RAW files. These tools correct common lens-related distortions for improved accuracy and realism.
For RAW Files
Evoto automatically applies lens profiles when available. You may also manually select a profile or fine-tune adjustments as needed.
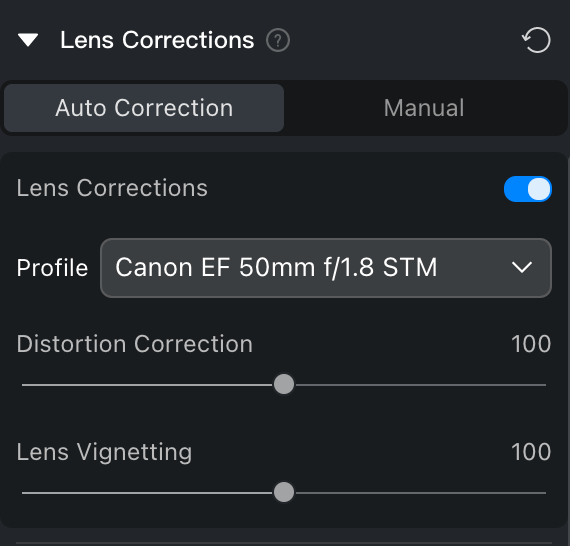
Lens Corrections Feature Group
- Distortion Correction: Fixes barrel or pincushion distortion to straighten lines and preserve perspective.
- Constrain Crop: Automatically crops to maintain composition after distortion correction.
- Lens Vignetting: Corrects brightness falloff near the corners of the image for balanced exposure.
- Midpoint: Refines geometric distortion, helping correct perspective errors.
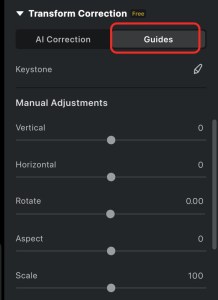
Transform Correction
Perspective distortion can occur when shooting from limited angles, causing vertical or horizontal lines in an image to appear tilted. To address this, the new Transform Correction module has been added to the Color module, allowing you to easily correct image distortion.

AI Transform Corrections
When enabled, you can select a correction mode for automatic distortion correction.
- Smart mode: The default mode, which automatically adjusts both horizontal and vertical distortion.
- Level mode: Focuses only on horizontal distortion correction.
- Vertical mode: Focuses only on vertical distortion correction.
Manual Transform Corrections
For precise control, a suite of manual adjustments is also available.
- Vertical: Corrects vertical perspective distortions, making vertical lines in the image straight.
- Horizontal: Adjusts horizontal perspective distortions, straightening lines along the horizon.
- Rotate: Rotates the image within the canvas to help align tilted shots.
- Aspect: Adjusts the image’s width-to-height ratio by stretching or compressing the canvas.
- Scale: Resizes the image within the canvas without altering the canvas dimensions, which is useful for cropping or framing.
- X Offset: Moves the image left or right within the canvas to help reposition subjects.
- Y Offset: Moves the image up or down within the canvas, allowing for vertical repositioning.
Please note: If you first apply a transform and then use AI Crop, it might cause an unusual or undesirable result. Please be cautious and adjust your workflow accordingly.
Transform Correction Guides
A new Guides feature has been added under Transform Correction, providing a more intuitive and controllable way to manually correct perspective distortion.
How to Use
Drag on the image to draw guide lines. Each guide line is defined by two endpoints. When two or more guide lines are drawn, the system automatically applies perspective correction. Up to four guide lines are supported.
Supporting Features
- Tool Overlay: Displays grid lines to assist with alignment.
- Constrain Crop: Automatically crops blank edges after correction.

Notes: Guide lines can be adjusted by dragging endpoints or moving the entire line, and can be deleted with one click. The correction result updates in real time as guides are adjusted. When using Guides, AI transform correction is automatically disabled.
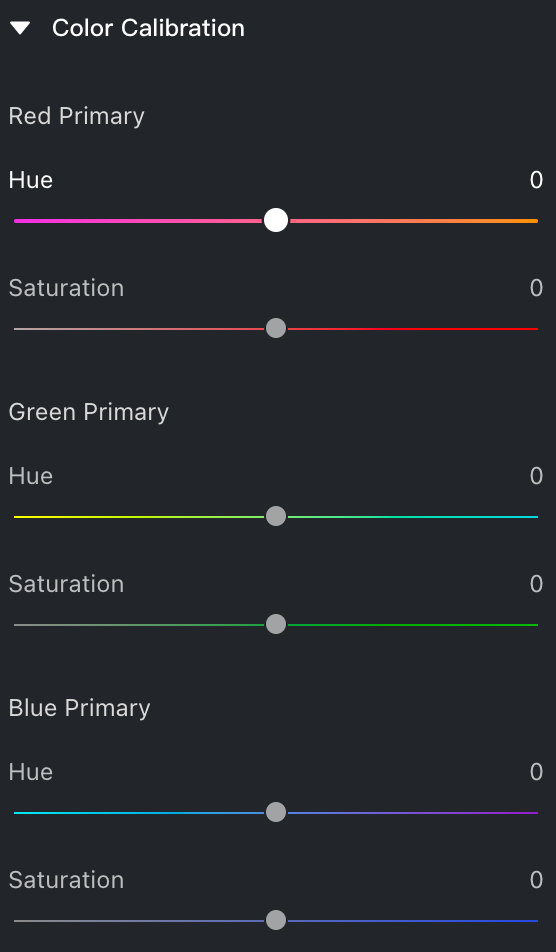
Color Calibration
The Color Calibration group allows you to correct or enhance color tones by adjusting the Hue and Saturation of the three primary color channels — Red, Green, and Blue. This helps fix color shifts or stylize your image for greater visual impact and realism.